¶ Environment setup
The following details how to set up your environment to develop a plugin on your local machine. This should not be run on the Busby server when developing.
First, nodejs version 20 must be installed on your computer.
It is strongly recommended to use Visual Studio Code. If you are using this, install the Busby delopment plugin by downloading the .vsix file from this page
To use a develop a custom typescript service you will need to set up NPM to be able to authenticate and use the Squaredpaper NPM repository for access to the busby packages.
The main package required for a custom service is @busby/esb.
To connect to our repository run this command. Please contact us to obtain the user name and password. For the email address enter your email address. This will login and set the @busby scope to be available from our registry.
npm login --global --scope busby --registry https://npm.squaredpaper.co.uk/
¶ Creating the Plugin
¶ Build the template
Once the environment has been set up to create a plugin using a template, run:
npm create @busby@latest <app-name>
Replace <app-name> with the name for the application, or omit this entirely and it will prompt you for the name. This will be the name of the folder that gets created.
It will prompt you for which type of app you are creating (Select Typescript Service) and a couple of other questions. Once done it will show you some additional commands to run at the end.
¶ Running and debugging your app
First you must create a Busby service to run your app against.
To do this, log into the Busby Configuration Editor and add a new service.
Click on custom service.

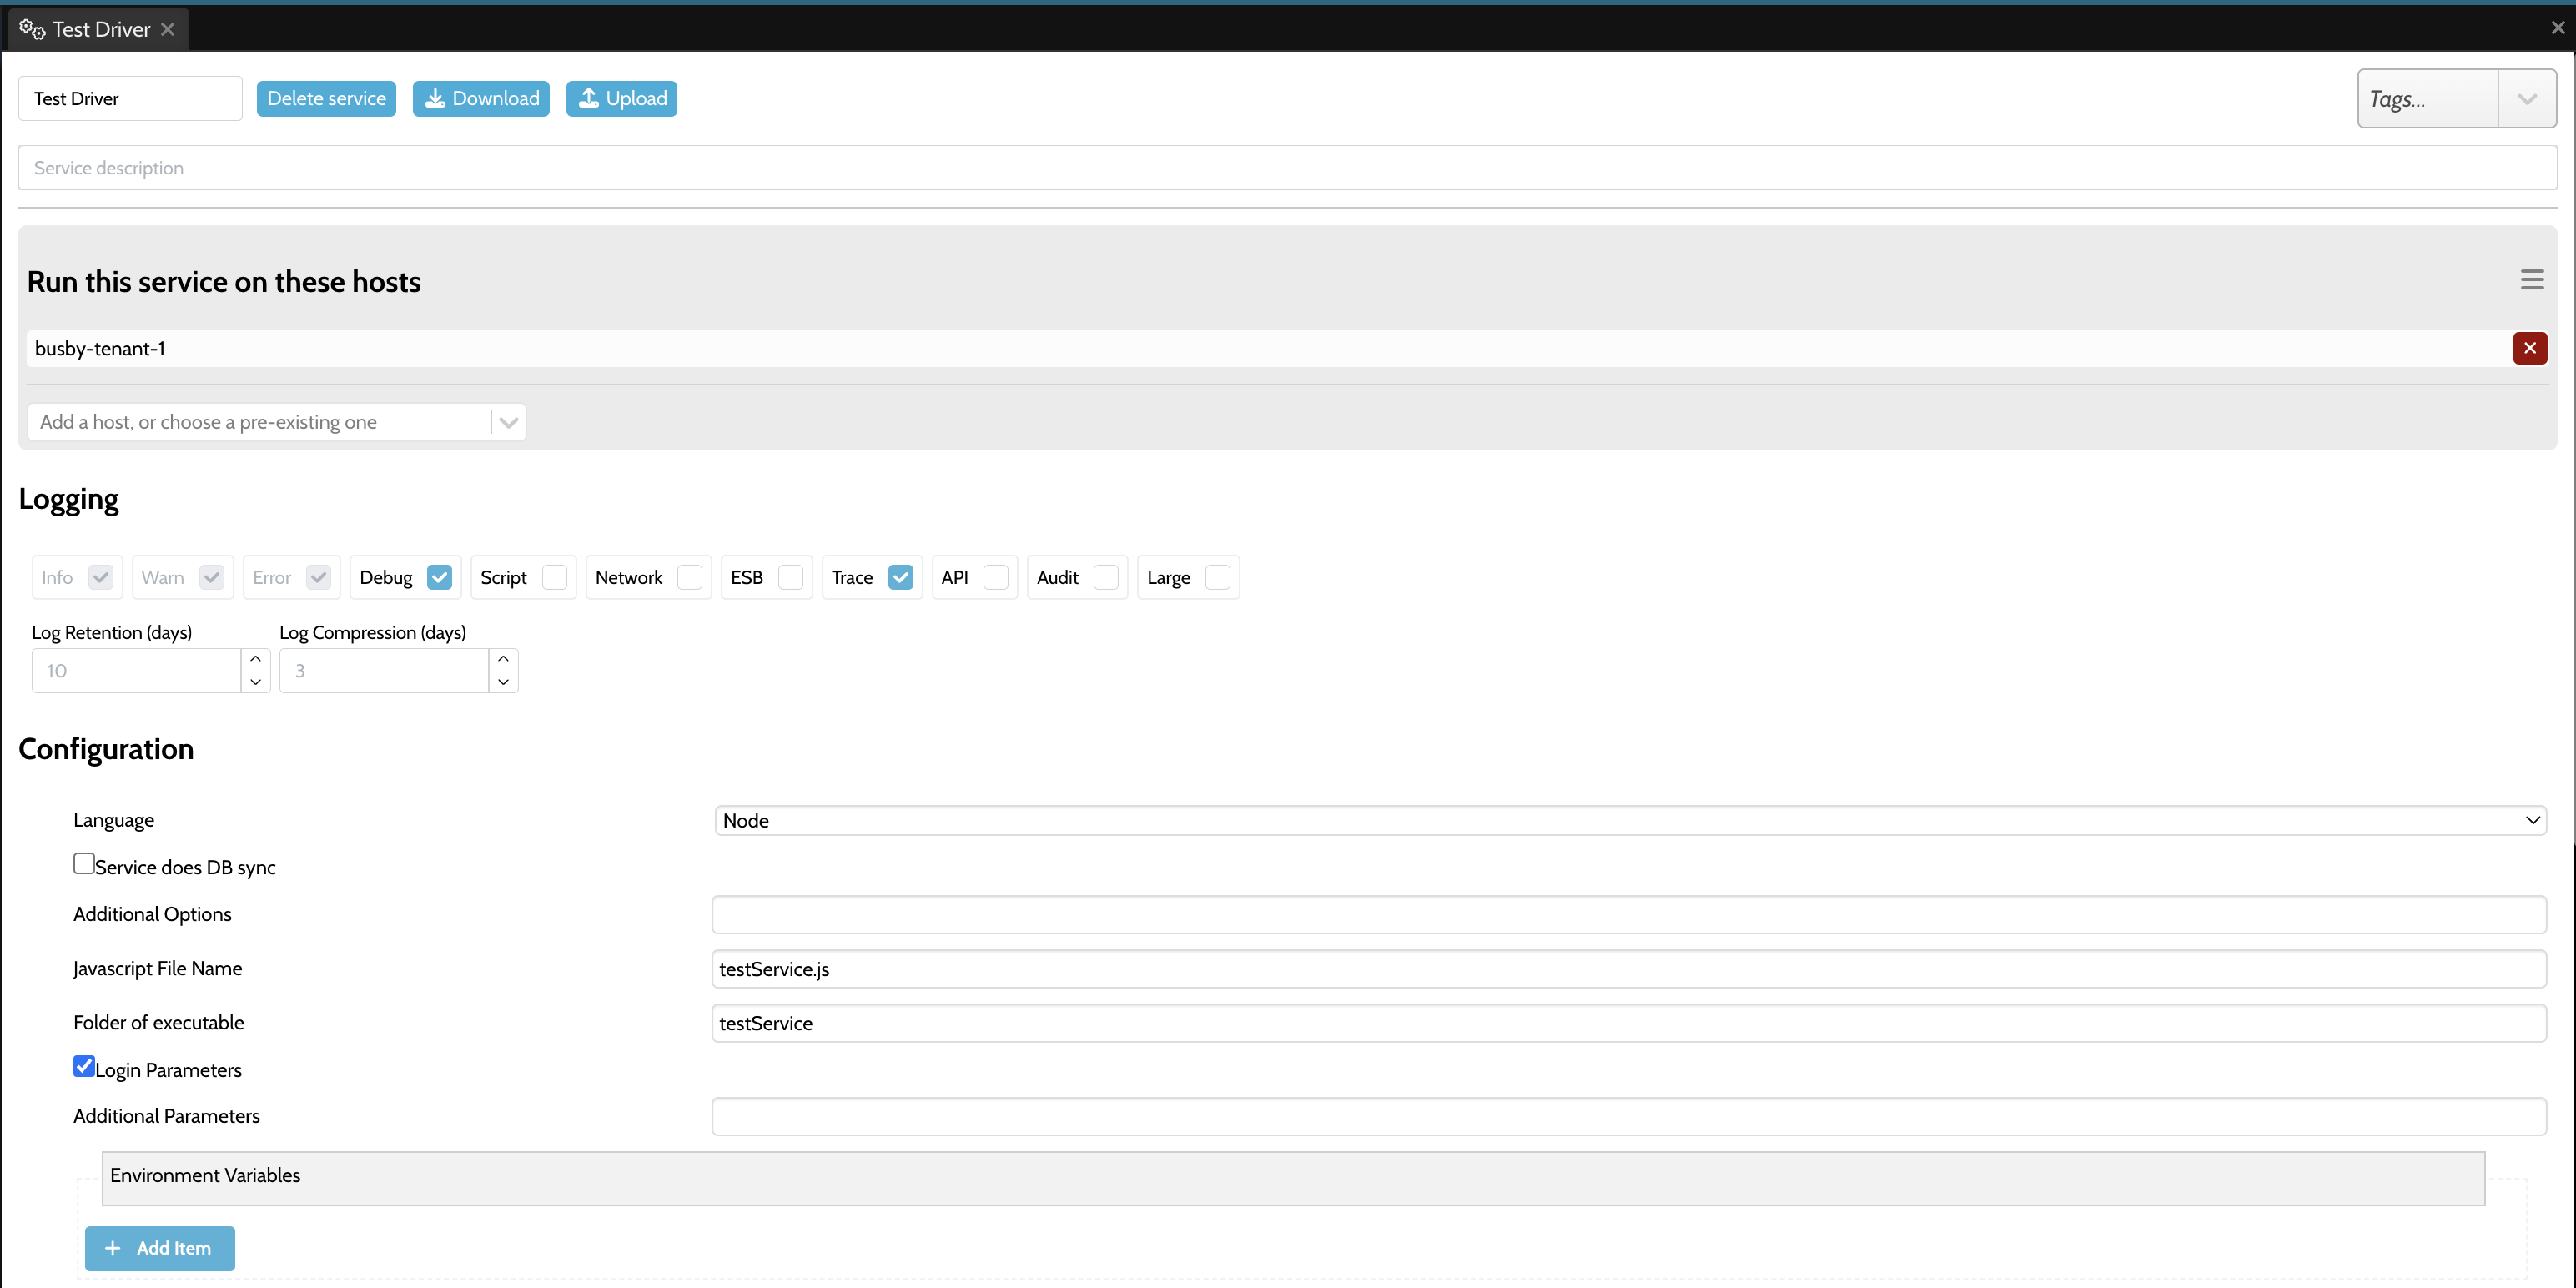
In the service details page, give your service a name, and select at least 1 host that the service will run on. It does not have to be started on this service during development, but it needs to be assigned to at least one host to create a service provider and generate a provider ID.
In the language drop down select node
Enter a javascript file name which will be generated when you webpack your service, the default is the name of the folder for your service + ".js" e.g. testService.js
Enter a folder name e.g. testService
Optionally set additional log levels
Ensure that login parameters is ticked
If you are wanting to run the sample boiler plate code, it requires a connection to the authentication service.
Put the following JSON in the advanced configuration box at the bottom:
{ "services": {"authenticationService": "authenticationService"} }
Publish your configuration
In VS Code you can now run the service. Click on the run and debug menu on the left hand side of VS Code and then at the top click on launch program

Enter the IP address of the Busby server you are developing against
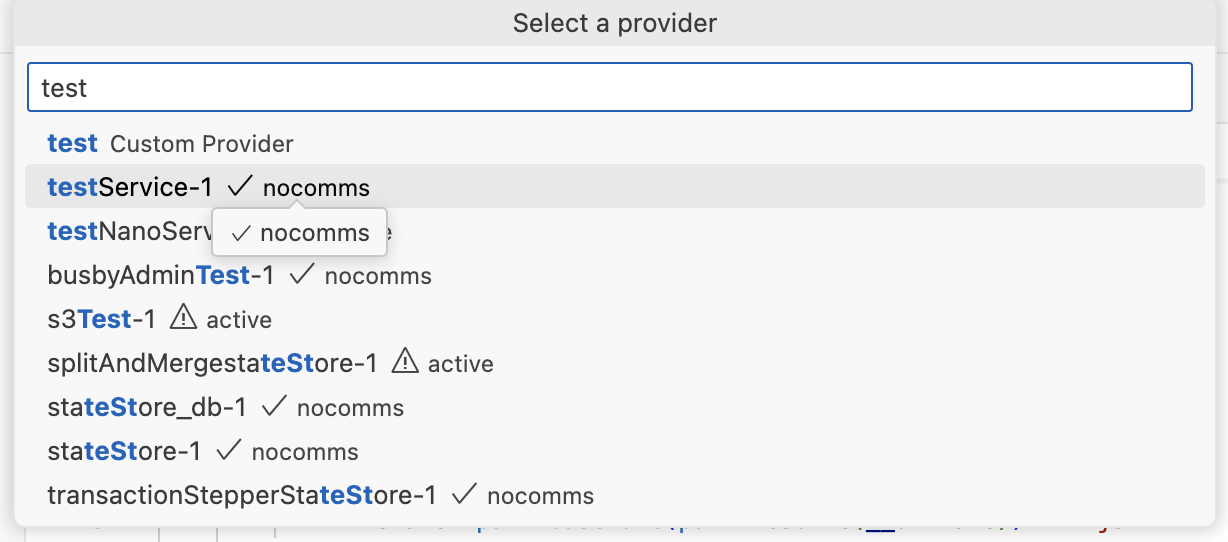
Then from the list select a provider ID of the service you just configured
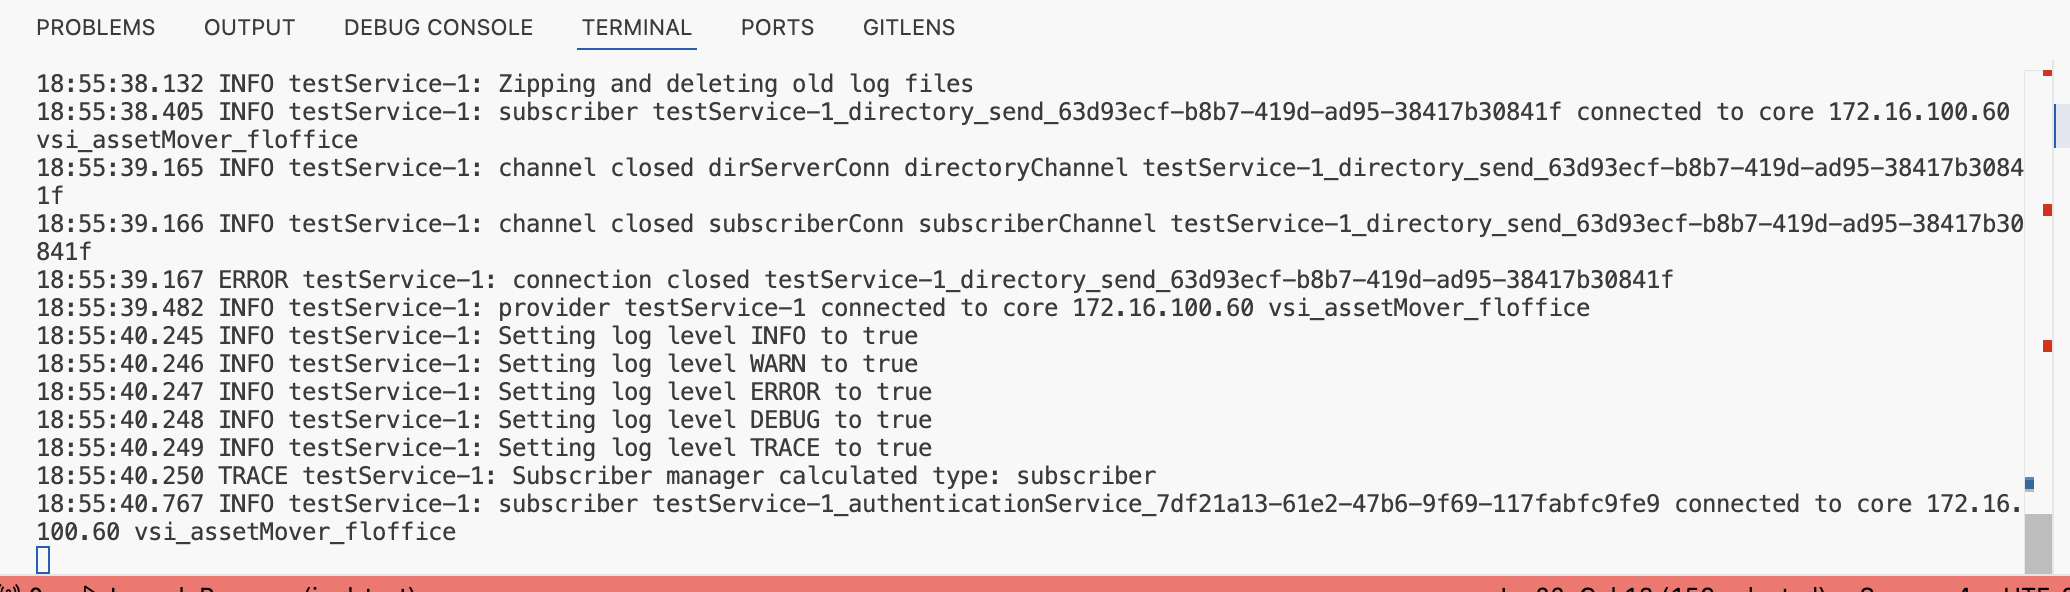
If your config is correct and your code runs you should see in the console of VS Code that the service is running, and if you look in Busby Admin you should see that your service is active.