Setting up Okta to use SAML is a fairly simple process.
¶ Okta Setup
These instructions assume:
- The address to access the system is
saml.demo.busby.localwhich can either be a single host or a loadbalancer- Selector is running at
https://saml.demo.busby.local(Using default SSL port 443)- Config Editor is running at
https://saml.demo.busby.local:8443(Using default SSL Port 8443)- Busby Admin is running at
https://saml.demo.busby.local:9443(Using default SSL Port 9443)
Okta uses different IdP Signing certificates for each app configured. So it is not recommended to make multiple applications to show each UI in the Okta App Dashboard as Busby Admin and Config Editor share the certificate. Selector is able to have a different one if needed. But one app with groups configured should be used where possible.
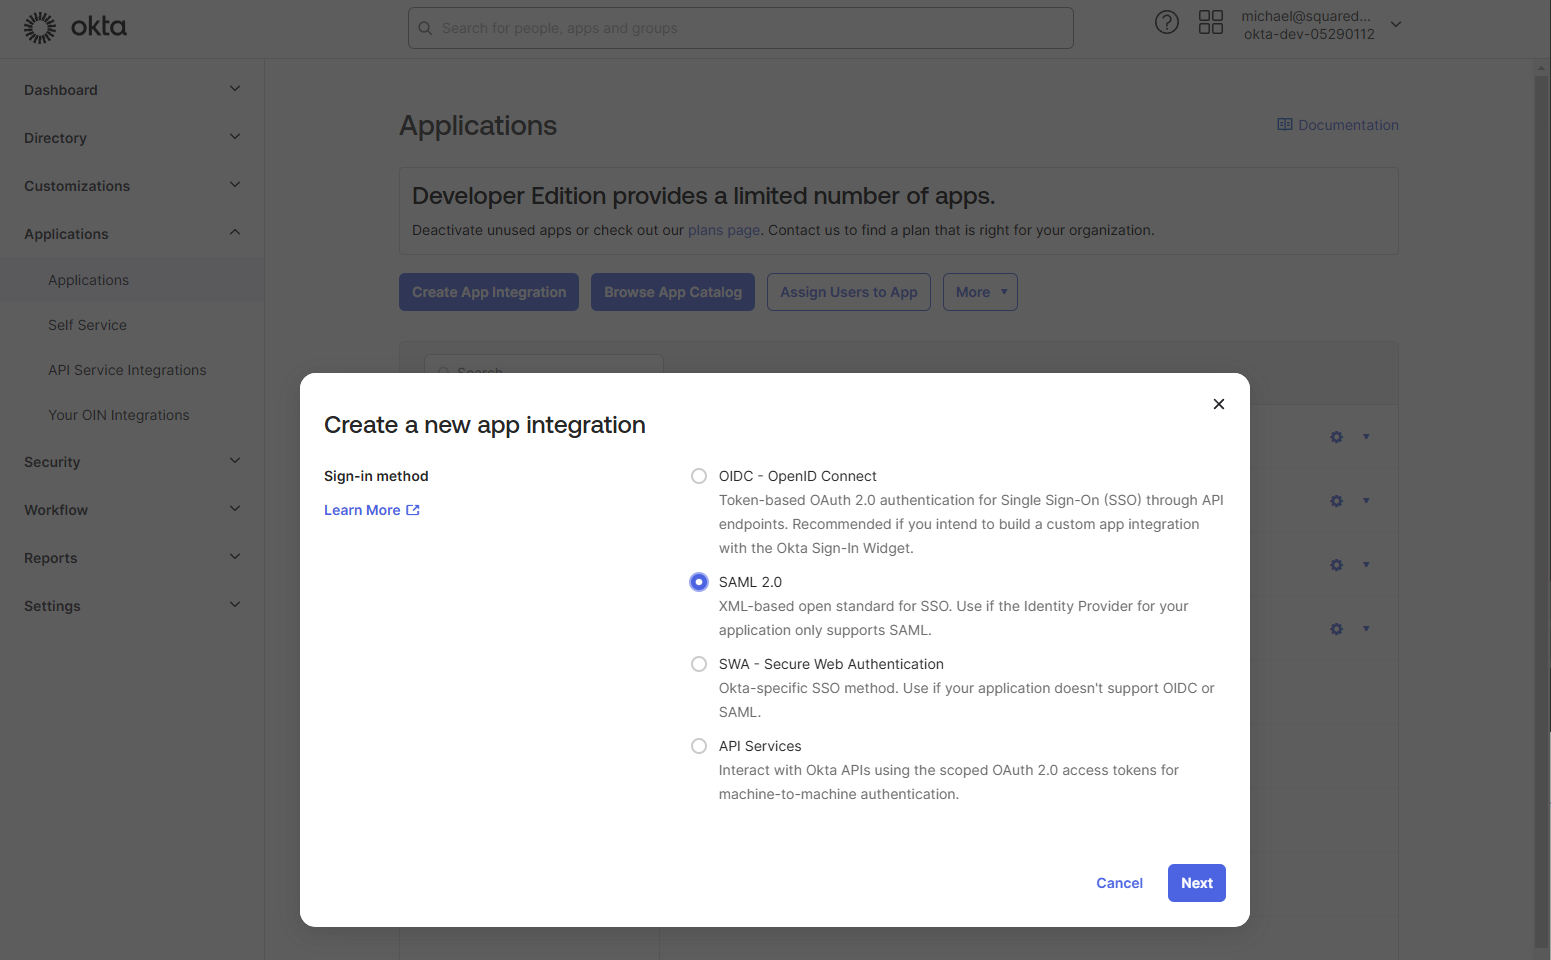
¶ 1. In the Okta Admin Console go to Applications and choose Create App Integration and select SAML 2.0
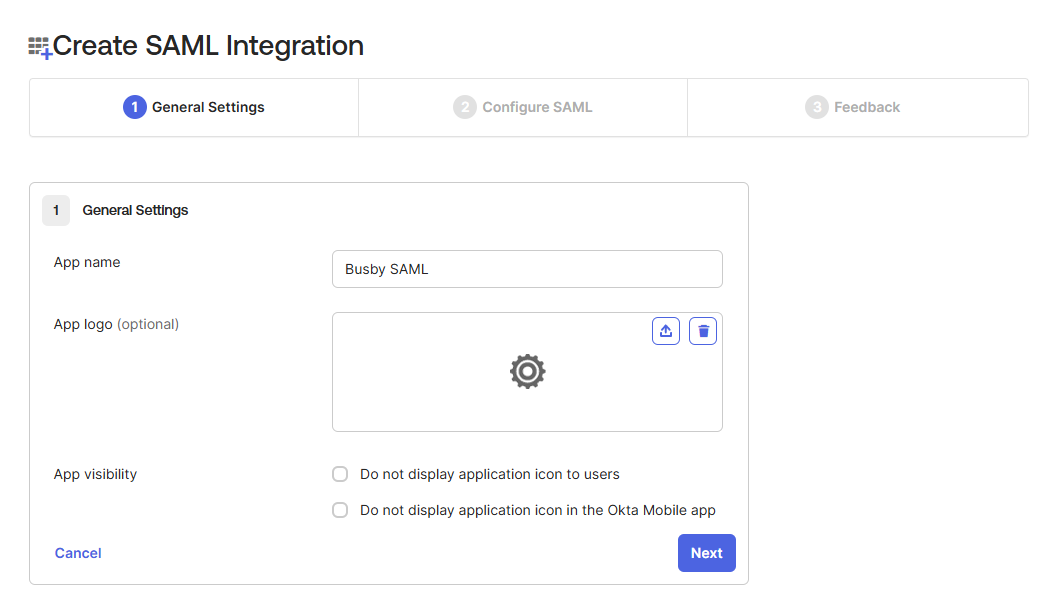
¶ 2. Give the application a name for example Busby SAML or just Busby and optionally add an image to display for the applciation
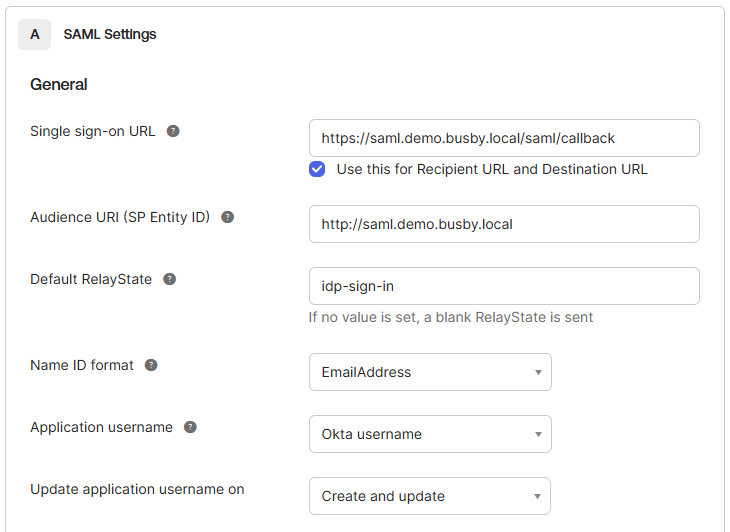
¶ 3. Configure the application settings
The Single sign-on url should be the url that will initiate the login. For all three of our user interfaces that support SAML this will be the url with /saml/callback. The audience URI (SP Entity ID) should be one which is configured for the whole system this will be used by all providers of the UI services so will be common. We recommend something that is just the name of the system in this case we will use http://saml.demo.busby.local
If you want this app displayed in the Okta Apps Dashboard for your users set the Default Relay State to idp-sign-in.
The username will need to be persistent and not change between requests/logins. This name is also displayed in the user interfaces so it would be useful if this was readable. By default this should be Email Address.
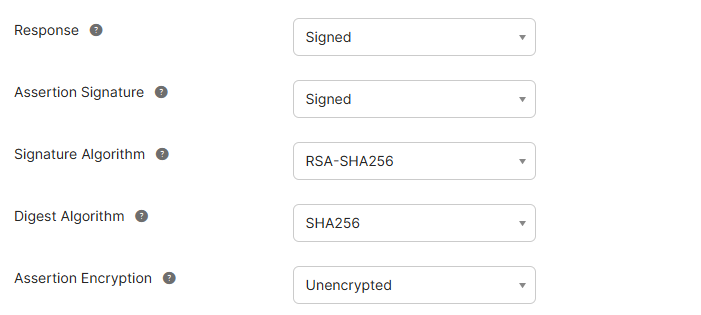
¶ 3.1. Configure Advanced Settings
The default advanced settings provide adequete security. You may also turn on Assertion Encryption and/or validating the SAML Requests. This may need to be done later once SAML is configured in Busby so that you are able to retrieve the signing certificate. (Can be accessed from any of the UIs when configured from /saml/cert)
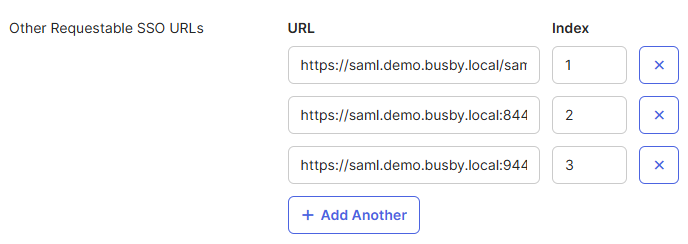
¶ 3.2 Optional Requestable SSO Urls
If you do not add the signing certificate then the additional SSO Urls need to be configured to allow for the redirects to go back to each of the applications.
These are all three urls with /saml/callback
¶ 4. Attributes
To map user data to the user please set the following attributes. To the shown values or any applicable fields mapped in your users. All are optional.
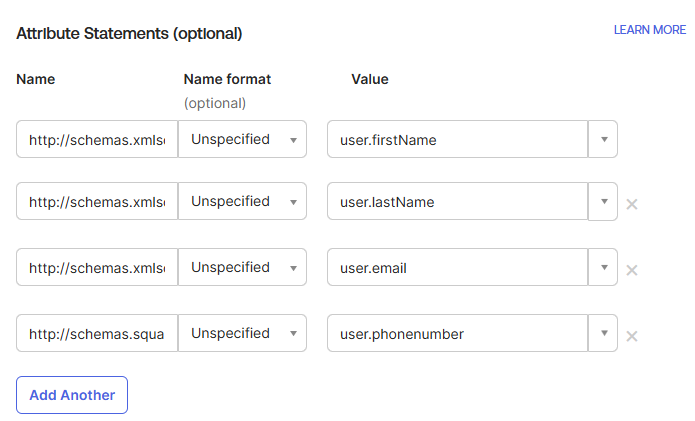
http://schemas.xmlsoap.org/ws/2005/05/identity/claims/givenname-->user.firstNamehttp://schemas.xmlsoap.org/ws/2005/05/identity/claims/surname-->user.lastNamehttp://schemas.xmlsoap.org/ws/2005/05/identity/claims/emailaddress-->user.emailhttp://schemas.squaredpaper.co.uk/claims/telephoneNumber-->user.phoneNumber
For the groups the claim should be http://schemas.squaredpaper.co.uk/claims/groups and the filter should be set to a relevant filter to select the relevant Okta groups to send to Busby.
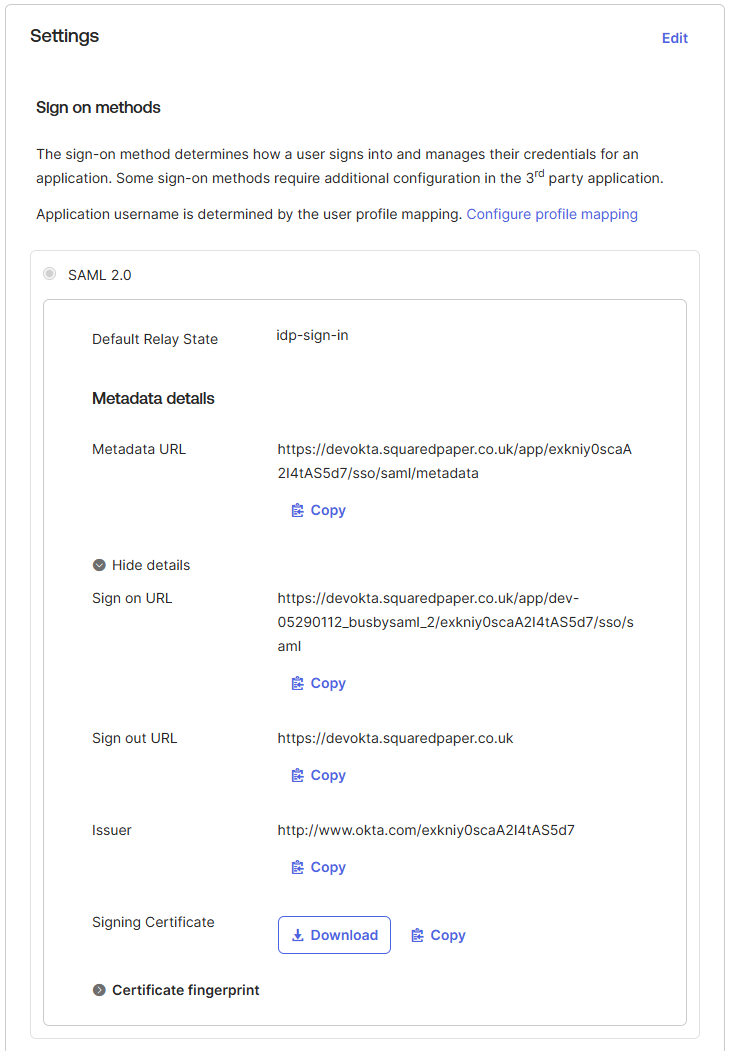
¶ 5. Get the signing certificates
From the Sign On section you will need to get the Sign on URL, Sign out URL and Issuer. You will also need to download the Siging Certificate. These are all available in the Sign On tab.
¶ 6. Assign Users and Groups
Last in the setup on this side is to add users and/or groups to the application to allow users to login based on your requirements. In the Assignmnets tab.
¶ Busby Setup
Once the application is created in Okta it then needs to be added to the configuration.
From the created application you will need:
- The Audience URI (SP Entity ID) that has been configured (Step 3)
- Attributes (Step 4)
- The Signing Certificate (Step 5)
- Login URL (Step 5)
- Issuer (Step 5)
- Logout URL (Step 5)
¶ 1. Authenticator Service
First set up the SAML Authenticator to validate and populate the Busby User. To do this follow the information in the SAML Authenticator page. This will need the Attributes from Step 4.
¶ 2. UI Configuration
Next once that service is set up. Follow the information in the UI SAML Setup page to setup the SSO logins using SAML.
Okta's
Audience URIisIdentifier (SP Issuer)
Both Signature Verification options should be enabled.
Make sure that
Append Service ID To Issueris not enabled as that is not supported in Okta.