The following guide details how to setup SAML for Google Workspace.
These instructions assume:
- The address to access the system is
saml.demo.busby.localwhich can either be a single host or a loadbalancer- Selector is running at
https://saml.demo.busby.local(Using default SSL port 443)- Config Editor is running at
https://saml.demo.busby.local:8443(Using default SSL Port 8443)- Busby Admin is running at
https://saml.demo.busby.local:9443(Using default SSL Port 9443)
Google's SAML implementation requires a separate SAML app per interface to be created to allow for logins across all three Busby User Interfaces.
¶ Google Workspace Setup
Repeat the following for each application requiring SAML authentication
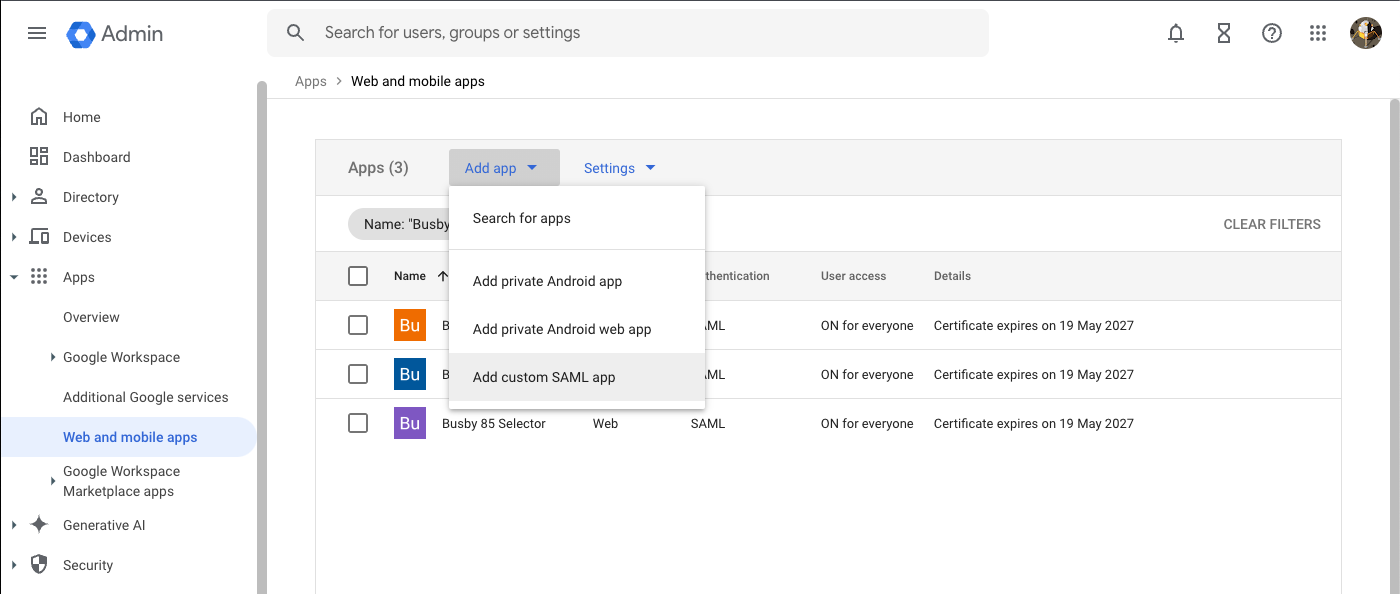
¶ 1. Add the App
From the Web and mobile apps at https://admin.google.com/ac/apps/unified in the Admin console select Add custom SAML app
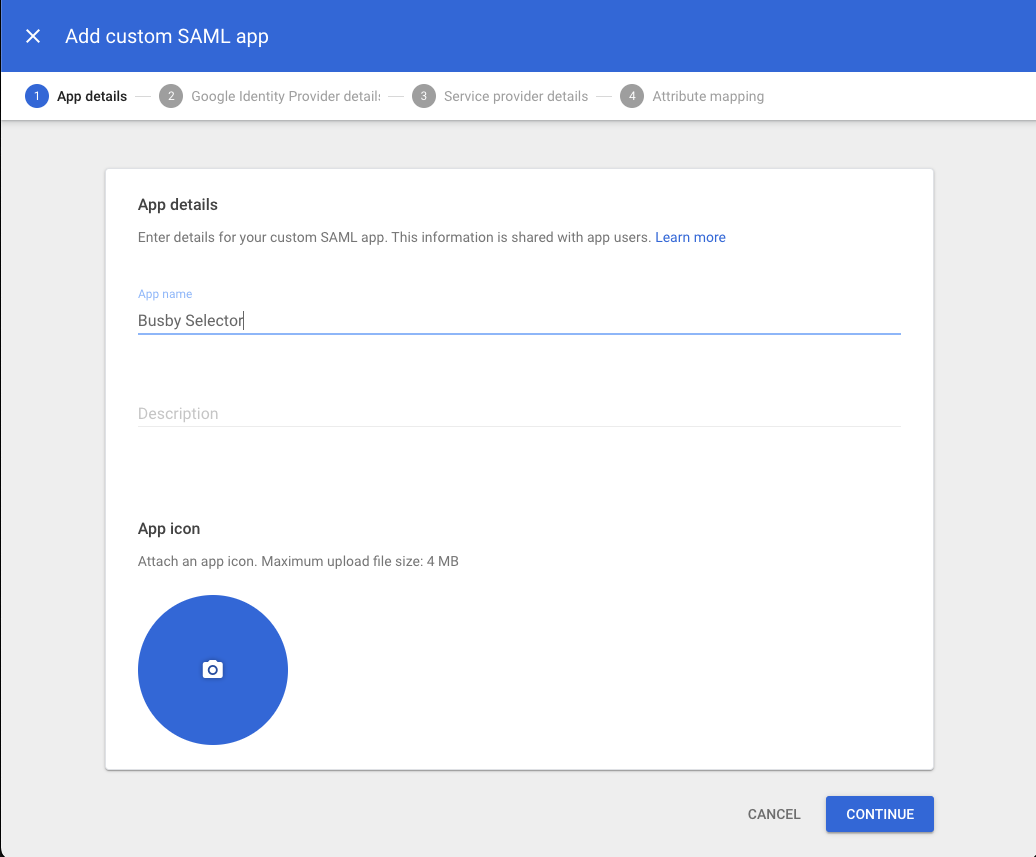
¶ 2. Name the App
Give the app a name eg Busby Selector / Busby Configuration / Busby Admin
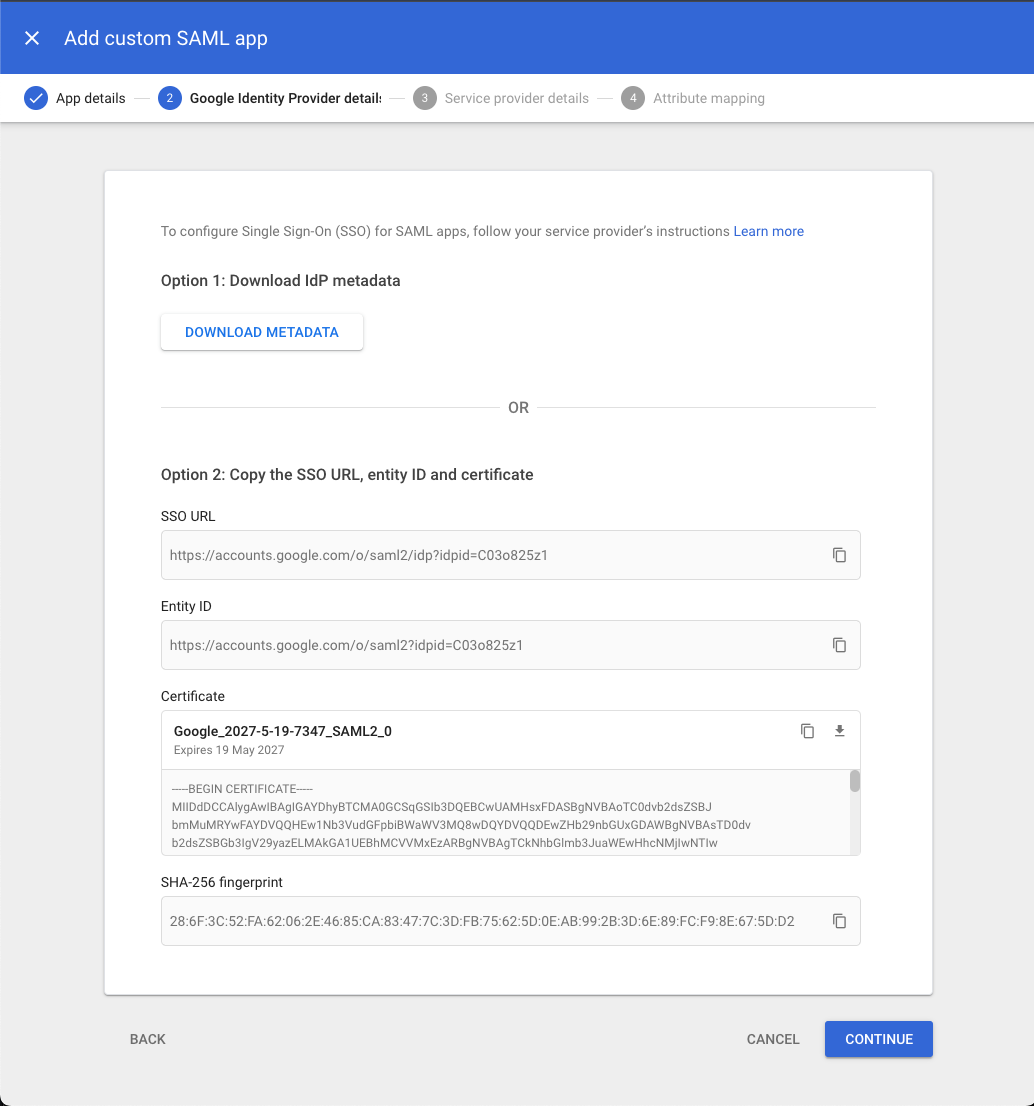
¶ 3. Copy information
Take note of the SSO URL, Entity ID and Certificate
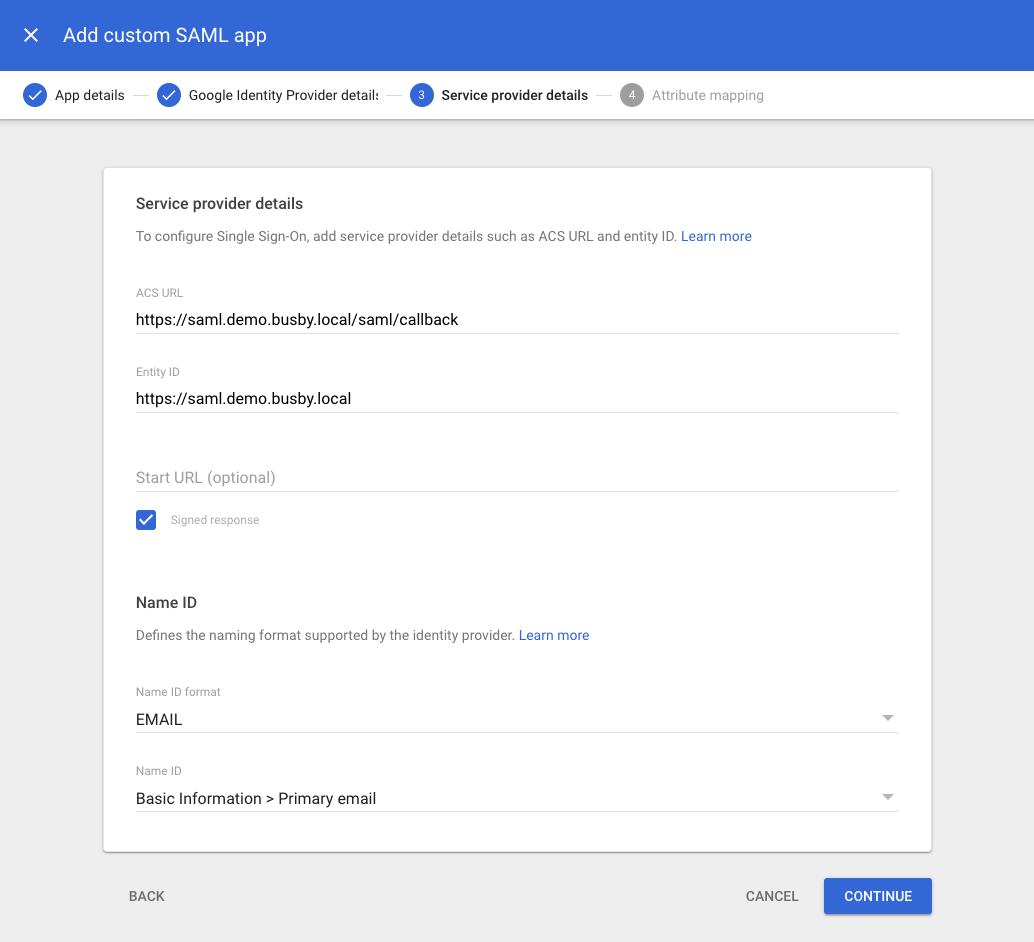
¶ 4. Enter the service provide details
Enter the ACS url for the current application. In the screenshot it is showing for Selector. For Config Editor in this guide it would be https://saml.demo.busby.local:8443/saml/callback. If the services are behind a load balancer use the appropriate address for the load balancer. (If you want to support both you would have to create more SAML apps in Google as it only allows one ACS URL).
Enter the Entity ID. This ID is the same across all of the applications so if you are making one for Selector, Config Editor, and Busby Admin then the Entity ID will be the same across all of them https://saml.demo.busby.local in this case.
Selector could have a different Entity ID if you are using a separate SAML config.
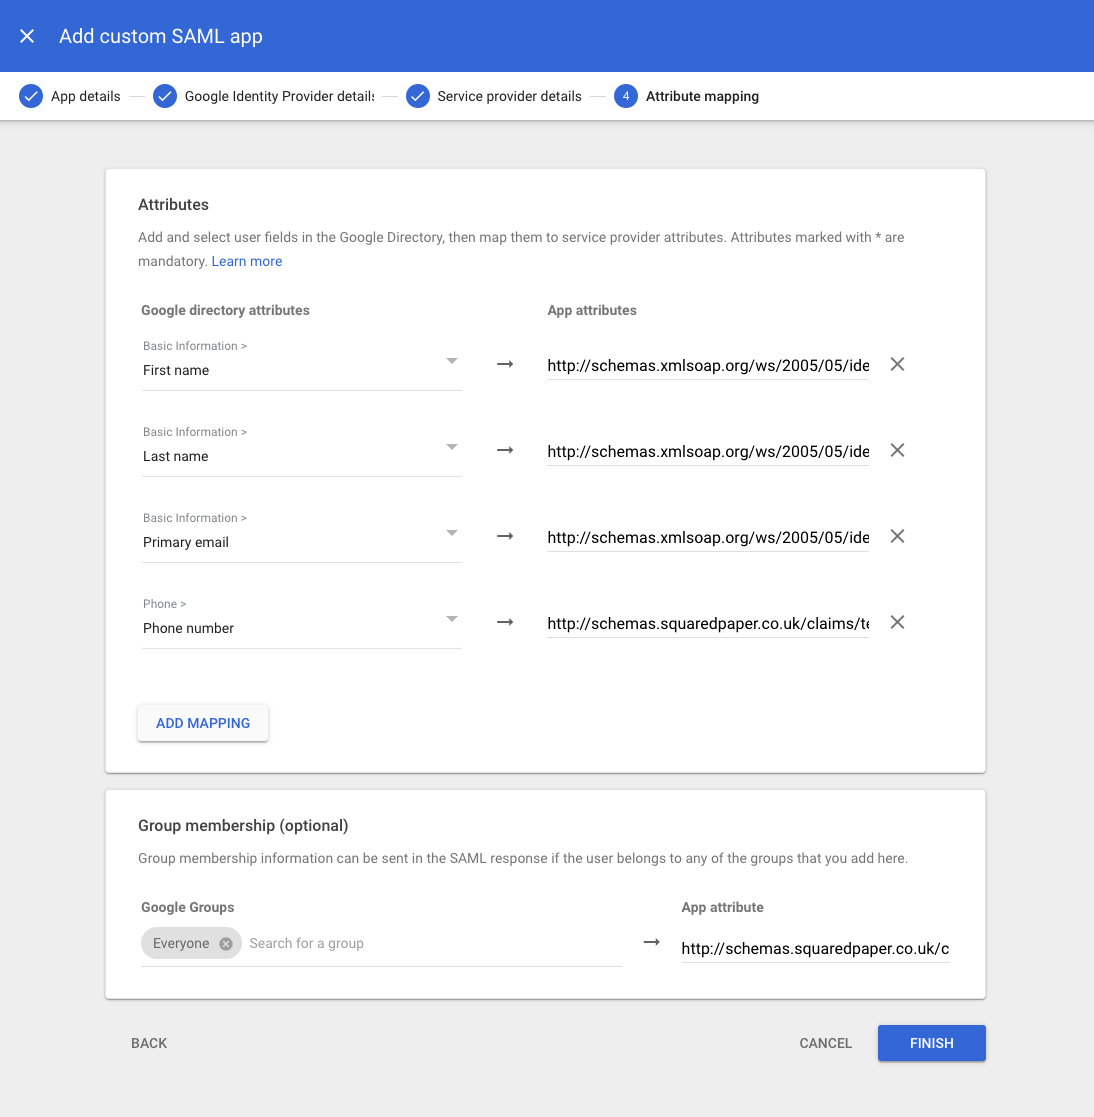
¶ 5. Map the attributes
These are the defaults that Busby accepts but you may name the App attributes which you can set when setting up in Busby later.
- Basic Informantion > First name:
http://schemas.xmlsoap.org/ws/2005/05/identity/claims/givenname - Basic Informantion > Last name:
http://schemas.xmlsoap.org/ws/2005/05/identity/claims/surname - Basic Informantion > Primary email:
http://schemas.xmlsoap.org/ws/2005/05/identity/claims/emailaddress - Phone > Phone number:
http://schemas.squaredpaper.co.uk/claims/telephoneNumber
Assign the groups which will be passed through and then set the groups attribute to be
http://schemas.squaredpaper.co.uk/claims/groups
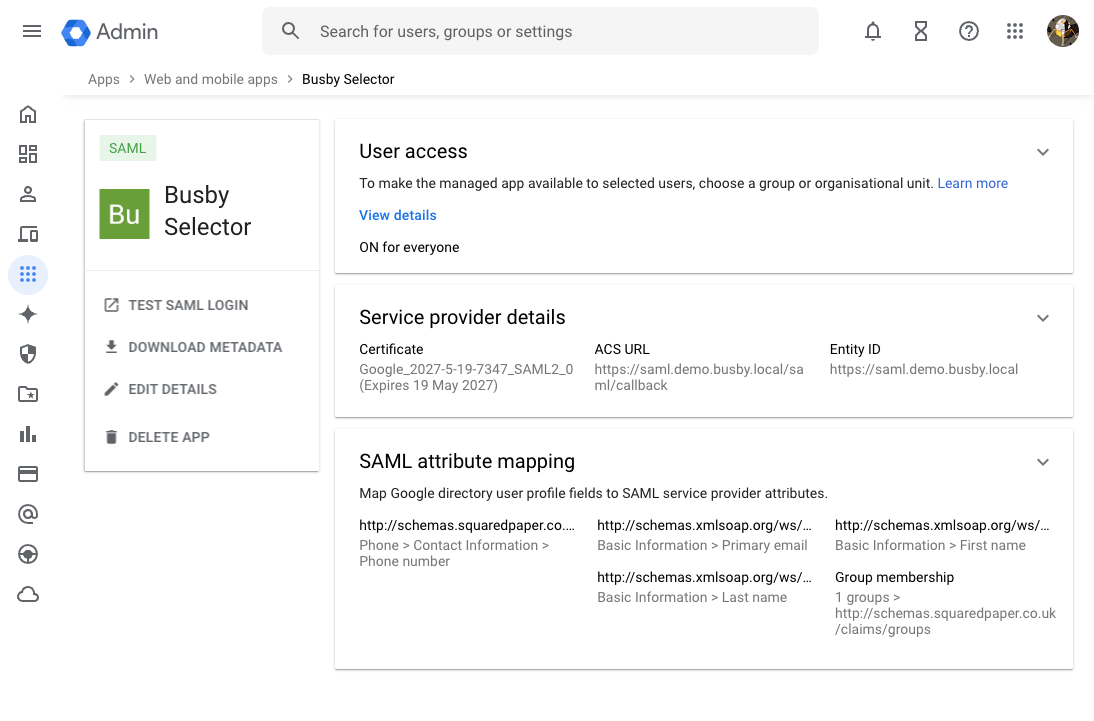
¶ 6. Enable the App for users
Last in the setup on this side is to turn the app on for the appropriate users under User Access
¶ Busby Setup
Once the applications are created in Google it then needs to be added to the configuration.
From the created application you will need:
- The Entity ID that has been configured (Step 4)
- Attributes (Step 5)
- The Signing Certificate (Step 3)
- Login URL (Step 3)
- Issuer (Step 3)
¶ 1. Authenticator Service
First set up the SAML Authenticator to validate and populate the Busby User. To do this follow the information in the SAML Authenticator page. This will need the Attributes from Step 5.
¶ 2. UI Configuration
Next once that service is set up. Follow the information in the UI SAML Setup page to setup the SSO logins using SAML.
The IdP certificate is the same across all SAML apps for your Google Workspace Tenant so you don't need different ones for each app.
Both Signature Verification options should be enabled.
Make sure that
Append Service ID To Issueris enabled as it needs to be multiple apps.