The following instructions detail how to setup the SAML integration for Busby to connecto to Entra ID.
These instructions assume:
- The address to access the system is
saml.demo.busby.localwhich can either be a single host or a loadbalancer- Selector is running at
https://saml.demo.busby.local(Using default SSL port 443)- Config Editor is running at
https://saml.demo.busby.local:8443(Using default SSL Port 8443)- Busby Admin is running at
https://saml.demo.busby.local:9443(Using default SSL Port 9443)
¶ Setup Entra ID Application
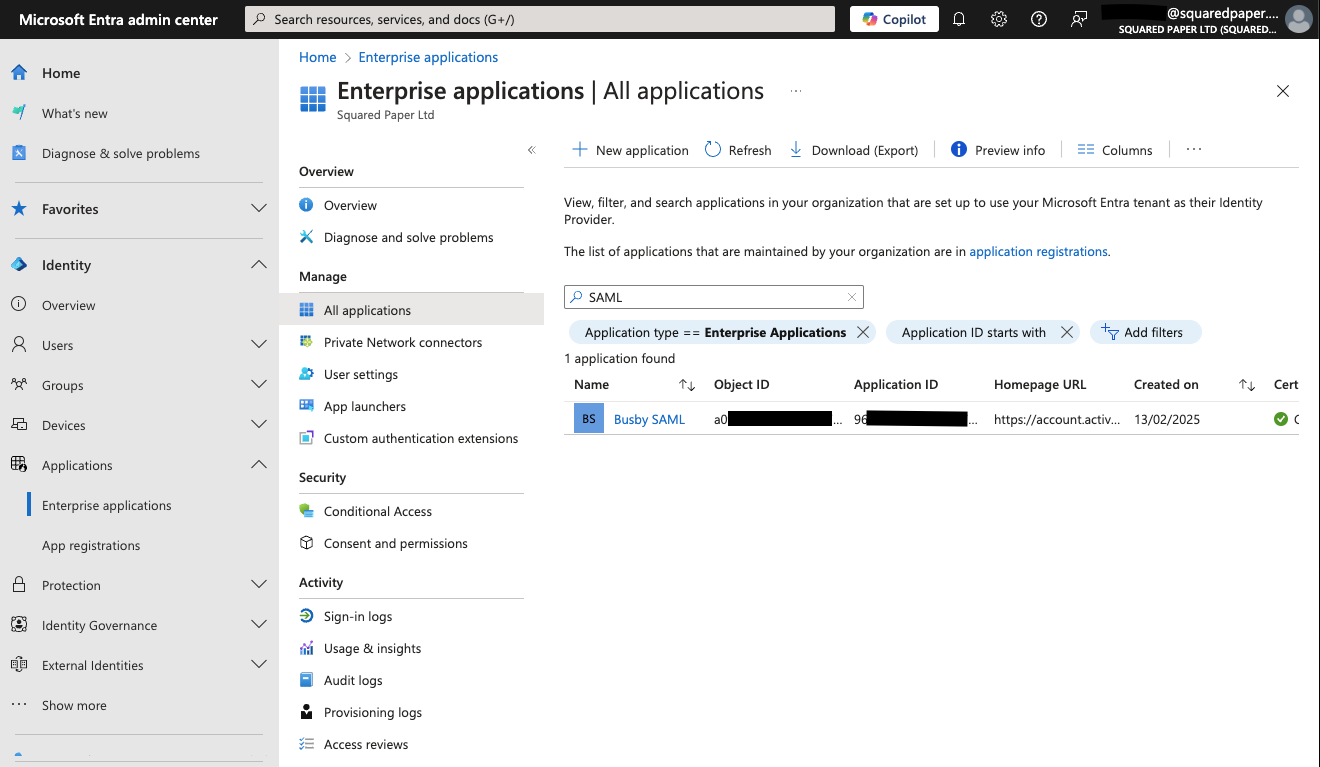
To begin with login to your Entra ID Tenant and navigate to the Enterprise applications blade.
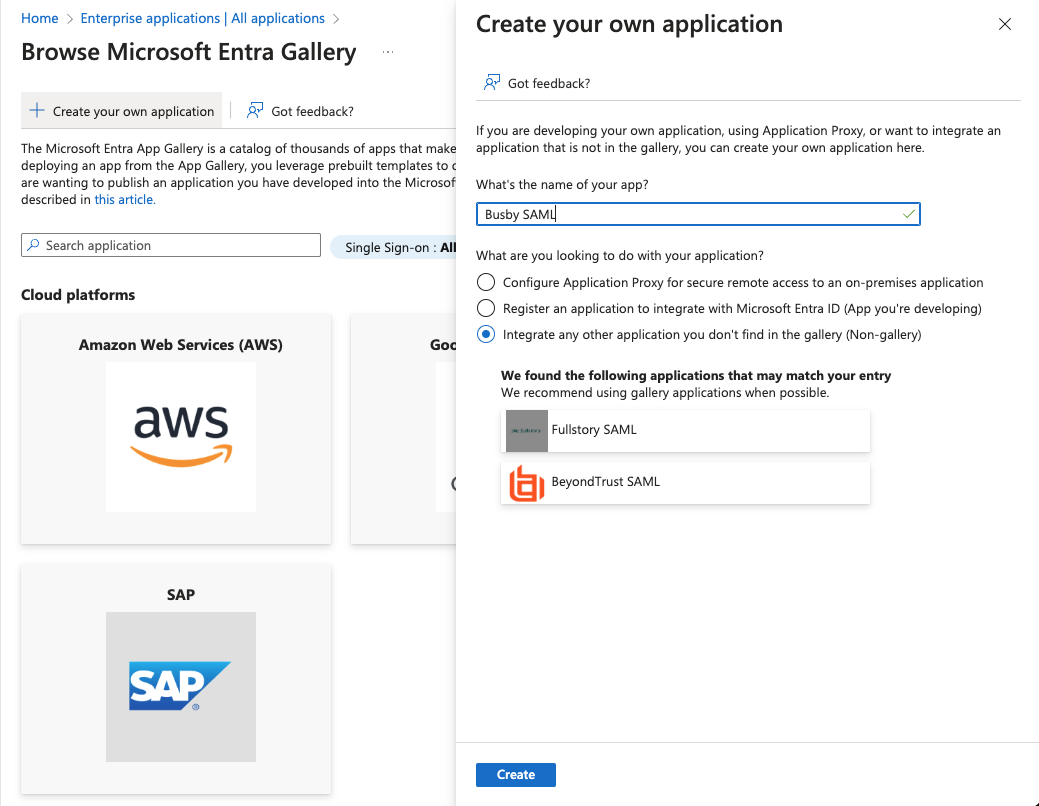
¶ 1. Click New Application then Create your own application
Give the application a name eg Busby SAML and select
Integrate any other application you don't find in the gallery (Non-gallery)
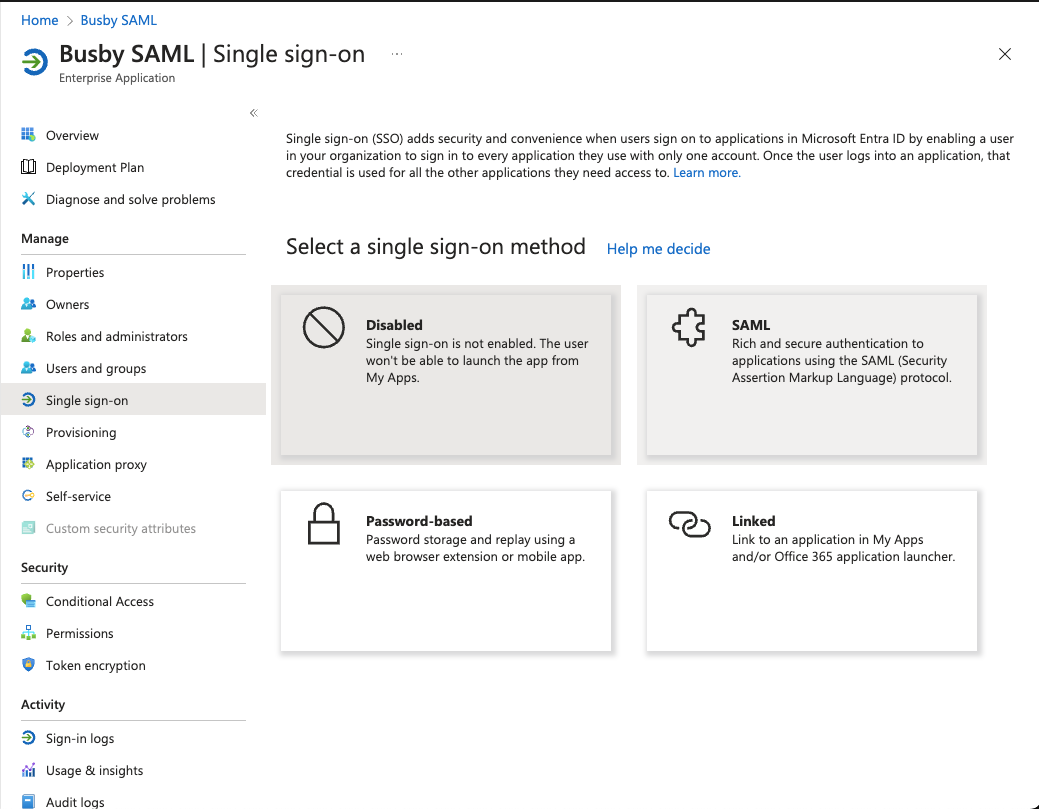
¶ 2. Once it has been added go to the Single sign-on section
Choose the SAML option
¶ 3. First setup the Basic SAML Configuration
Click the Edit button
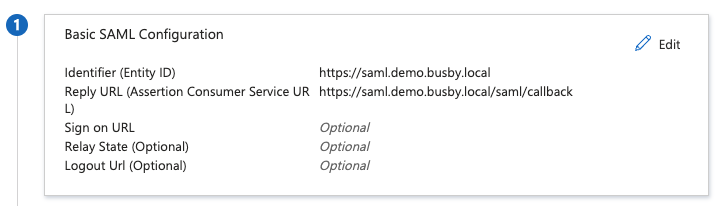
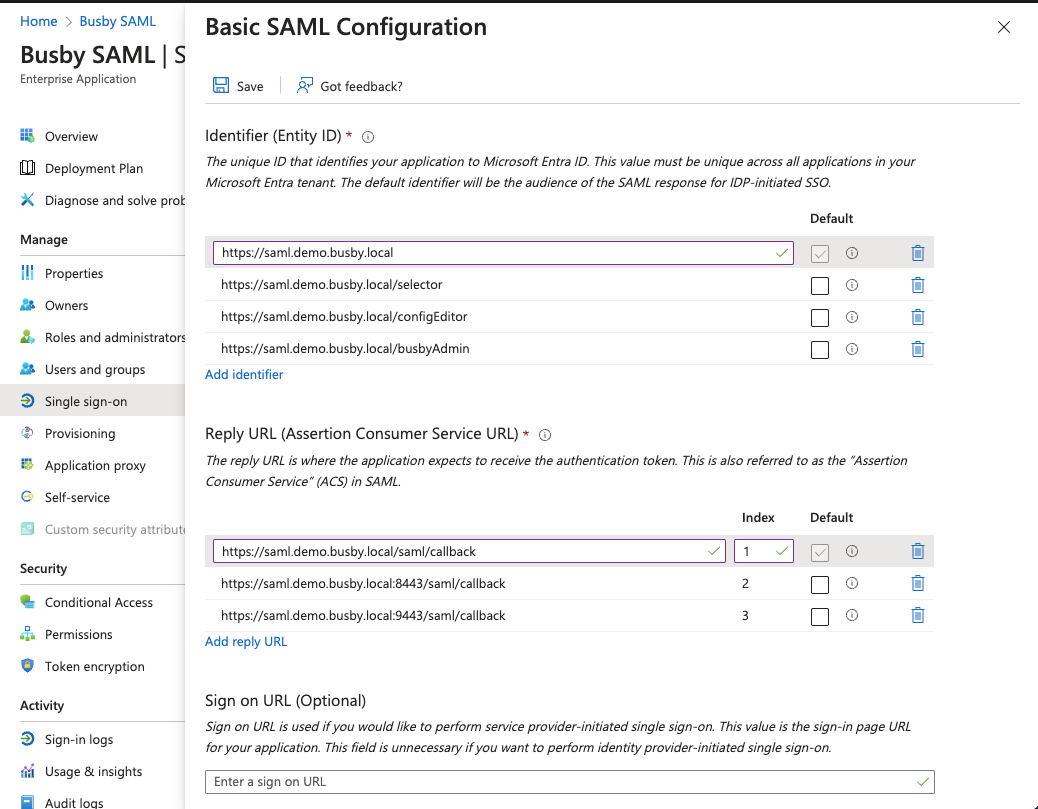
Then fill in the identifiers and reply URLs
The identifier is the value that will be used to identify the application. Depending on your use case you can enter either one Entity ID or multiple.
Each Selector could havd different Entity IDs if needed. Config Editor and Busby admin will either be just the base Entity ID or the base Entity ID with /configEditor and /busbyAdmin appended.
In the screenshot this shows the possible entity IDs when setting the Identifier to https://saml.demo.busby.local
Additionally all the required Reply / Assertion Consumer Service URLs need to be added. These are the access urls with /saml/callback appended to them. See the screenshot and the assumptions at the start of this guide.
¶ 4. Setup the required claims
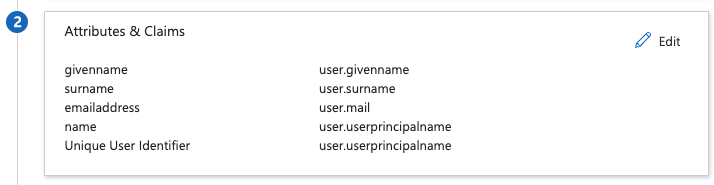
Busby requires a couple of additions to the claims passed through. The defaults give most of the required information. Select the Edit next to Atributes & Claims
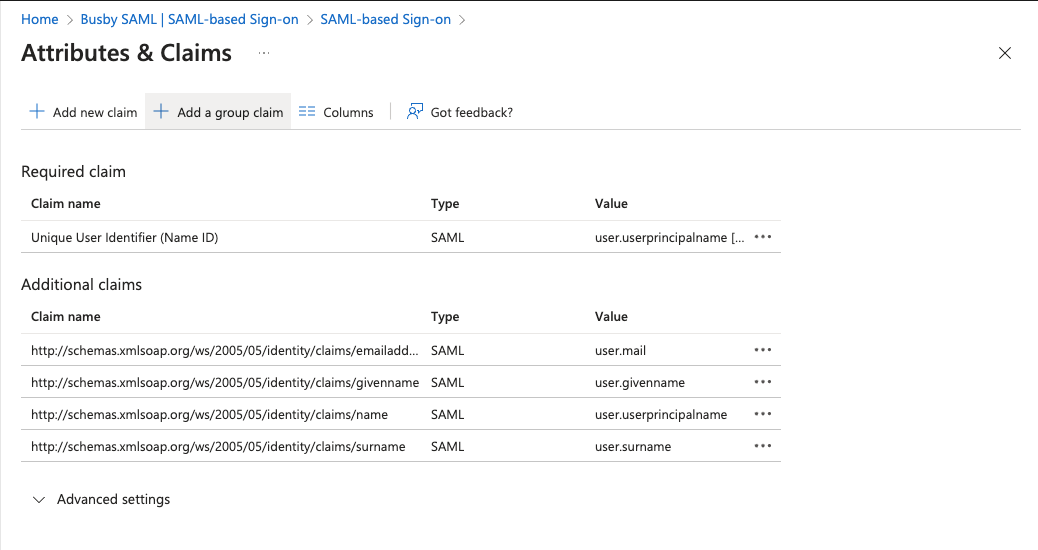
We need to add the Groups Claim to be able to receive the valid groups. Select Add a group claim
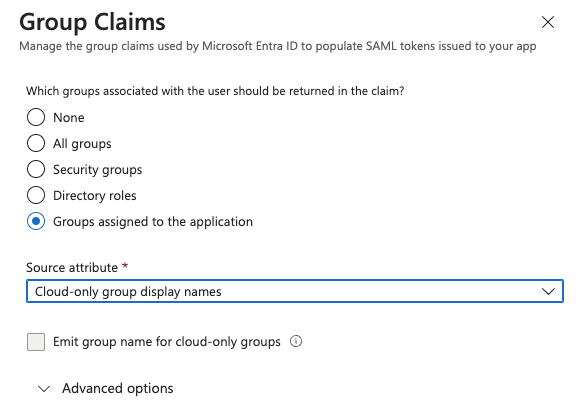
In the claims select Groups assigned to the application and use a source attribute of Cloud-only group display names. This allows the groups to be passed through the assertion. Alternatively depending on your use case this may be set to any appropriate claim for you, but it should return the display names of the groups rather than any id values as they will be displayed in UIs for permissions.
It is possible to use roles instead of groups but that is outide the scopr of this guide
Optionally you can also add another claim for the phone number. By default we use http://schemas.squaredpaper.co.uk/claims/telephoneNumber for the phone number so you can add a claim to map a phone number to that claim and it will be imported into Busby.
¶ 5. Set up security
Download the Certificate (Base 64) which will be needed when configuring the application in Busby.
Click Edit next to the Token Signing Certificate as we need to enable signing both the SAML response and assertion.
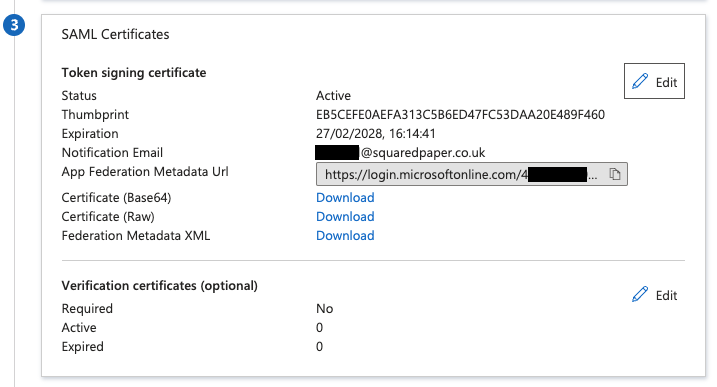
Change the Signing option to Sign SAML response and assertion. Our integraton will validate the signature of both.

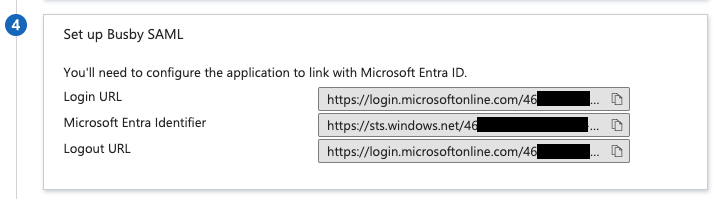
¶ 6. Copy down the URLs and Identifiers
Note down all three items in section 4.
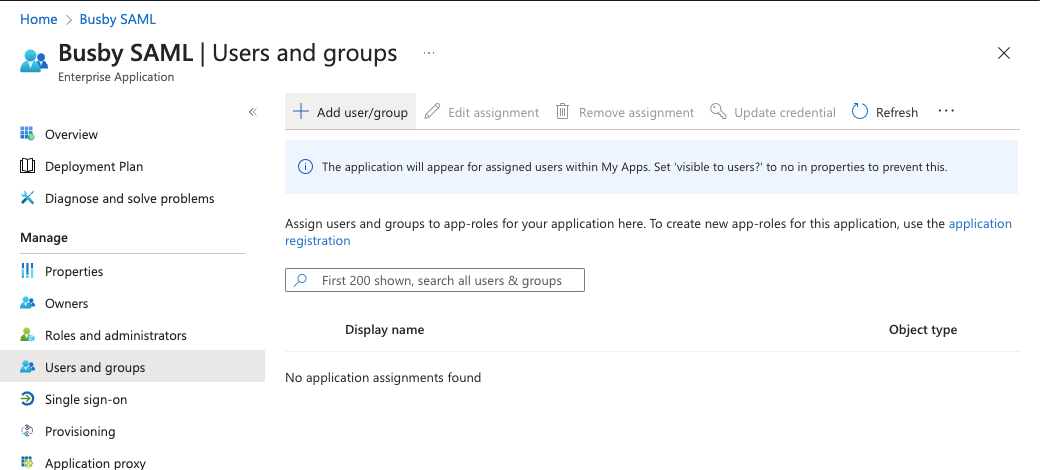
¶ 7. Add users and groups
Last in the setup on this side is to add users and/or groups to the application to allow users to login based on your requirements.
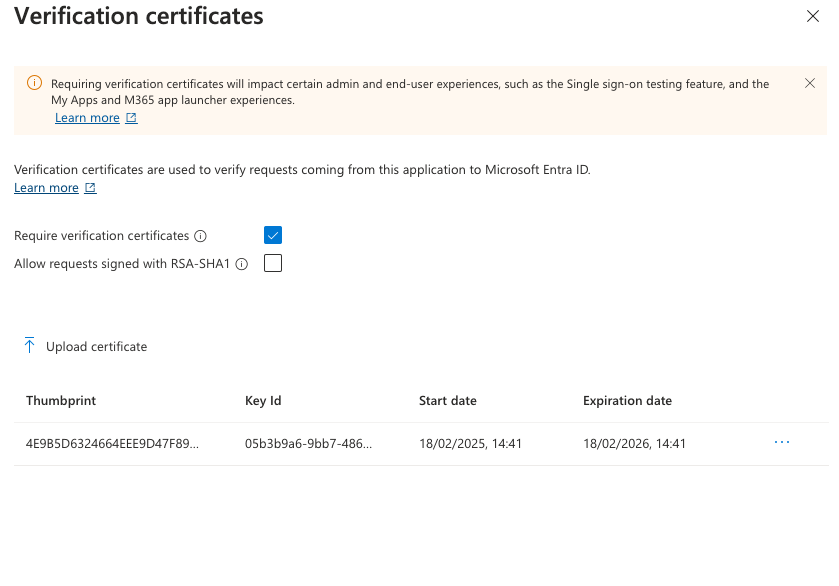
¶ 8. Optional: Setup Certificate Verifcation
If you need to enable additional verification you can optionally add Certificate Verification. This disables IdP initiated logins.
Click Edit next to the Verifications Cerificates.
You will then need to upload the SAML certificate from Busby. This requires the below steps to have been completed. To obtain the certificate you can download it from any of the User Interfaces that have it configured from /saml/cert for example from Config Editor in this guide https://saml.demo.busby.local:8443/saml/cert this will download the certificate which you can then upload.
¶ Setup Busby
Next is to configure Busby to use Entra ID as its SAML provider.
From the created application you will need:
- The Entity ID that has been configured (Step 3)
- The Certificate in Base 64 (Step 5)
- Login URL (Step 6)
- Microsoft Entra Identifier (Step 6)
- Logout URL (Step 6)
¶ 1. Authenticator Service
First set up the SAML Authenticator to validate and populate the Busby User. To do this follow the information in the SAML Authenticator page.
If using the claims above for the group claim use the Entra ID Groups ( http://schemas.microsoft.com/ws/2008/06/identity/claims/groups ) group attribute option.
If you have a slightly different setup and are using roles instead which is outside the scope of this guide. If you do then use the Entra ID Roles ( http://schemas.microsoft.com/ws/2008/06/identity/claims/role ) group attribute option.
¶ 2. UI Configuration
Next once that service is set up. Follow the information in the UI SAML Setup page to enable the SSO logins.
Entra ID's
Microsoft Entra IdentifierisIdentifier (SP Issuer)
Both Signature Verification options should be enabled.