These instructions detail how to setup Entra ID with user synchronization. There are two other options with Entra ID which support JIT (Just-In-Time) configuration which require the OAuth Authenticator or SAML Authenticator. The JIT requires for OAuth requries the setup below with less permissions. For Syncing follow below.
These instructions assume:
- The address to access the system is
oauth.demo.busby.localwhich can either be a single host or a loadbalancer- Selector is running at
https://oauth.demo.busby.local(Using default SSL port 443)- Config Editor is running at
https://oauth.demo.busby.local:8443(Using default SSL Port 8443)- Busby Admin is running at
https://oauth.demo.busby.local:9443(Using default SSL Port 9443)- The user group is called
Busby Users
¶ Entra ID Setup
¶ 1. Setup a user group
If using syncronisation you will need to set up a group in your directory where all users and groups you want to allow access will be placed underneath. The sync will search for that group and find all members and transitive members of groups assigned to that group. In our case we will use one called Busby Users
¶ 2. Create the applicaiton
To create the OAuth Application in Entra go to the App registrations blade in your Entra ID Admin and select Register an application
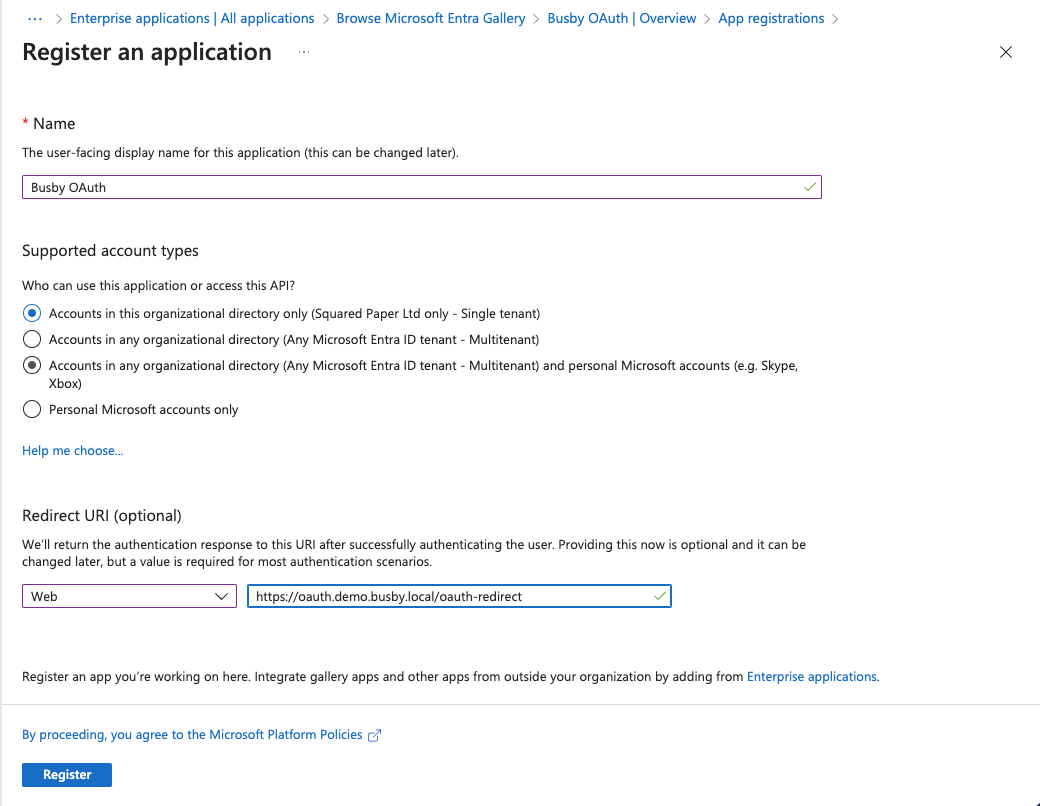
¶ 3. Register the application
Choose a name for the application and choose who is able to login.
We can also supply a Redirect URI here. These will be the application url appended with /oauth-redirect. The example shows selector. You will be able to add the other urls later once the app has been registered.
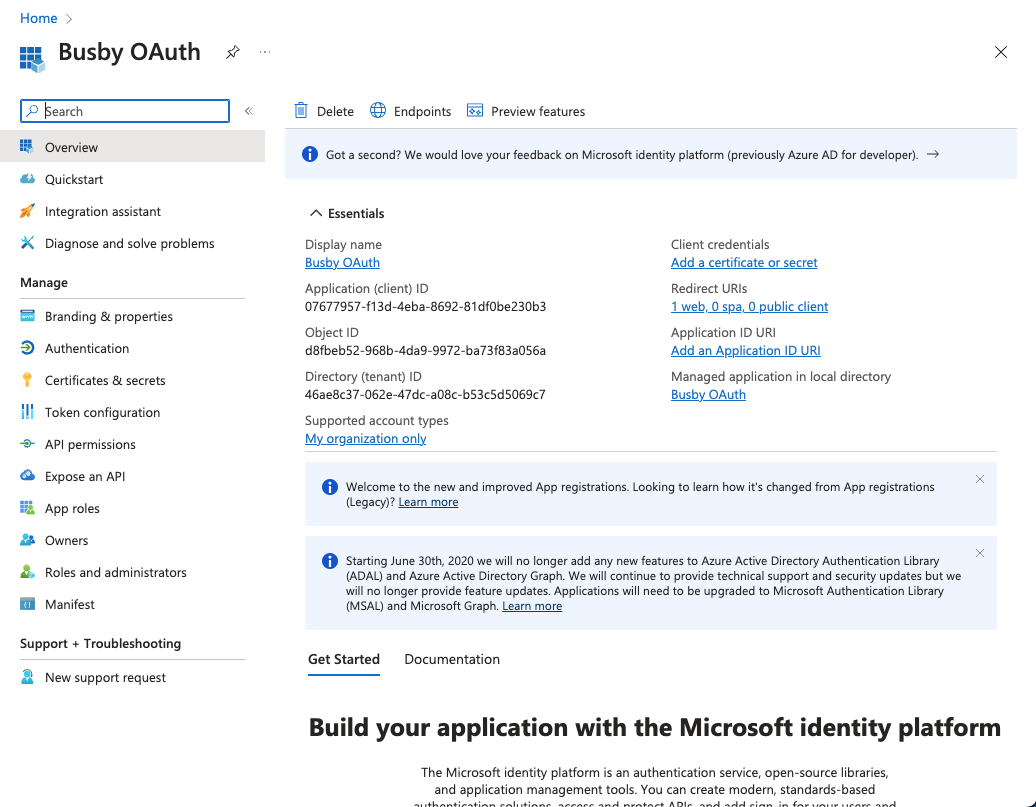
¶ 3. Copy the application id
We will need the Application (client) ID when we register the application in Busby, that is avaialble in the Overview page of the application.
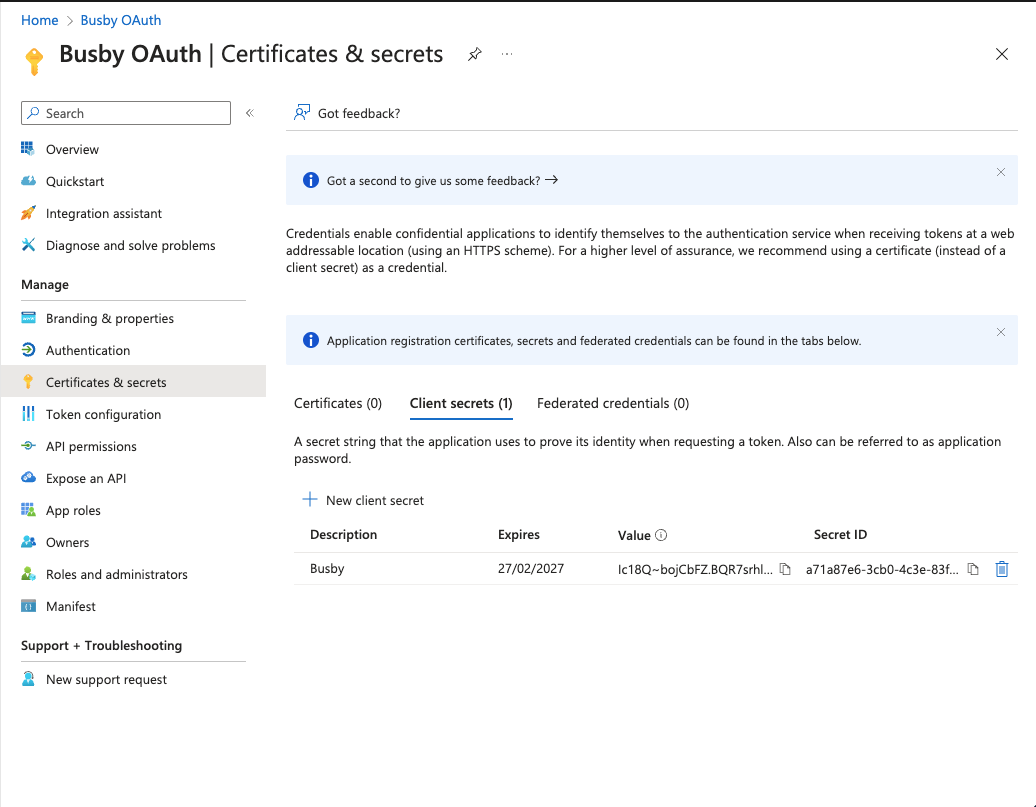
¶ 4. Create a secret
Next we need to add a secret for the api access and to request the tokens for user access.
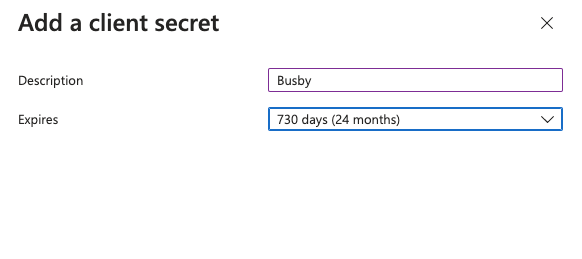
Copy the secrt value as this will be needed when we register the application in Busby.
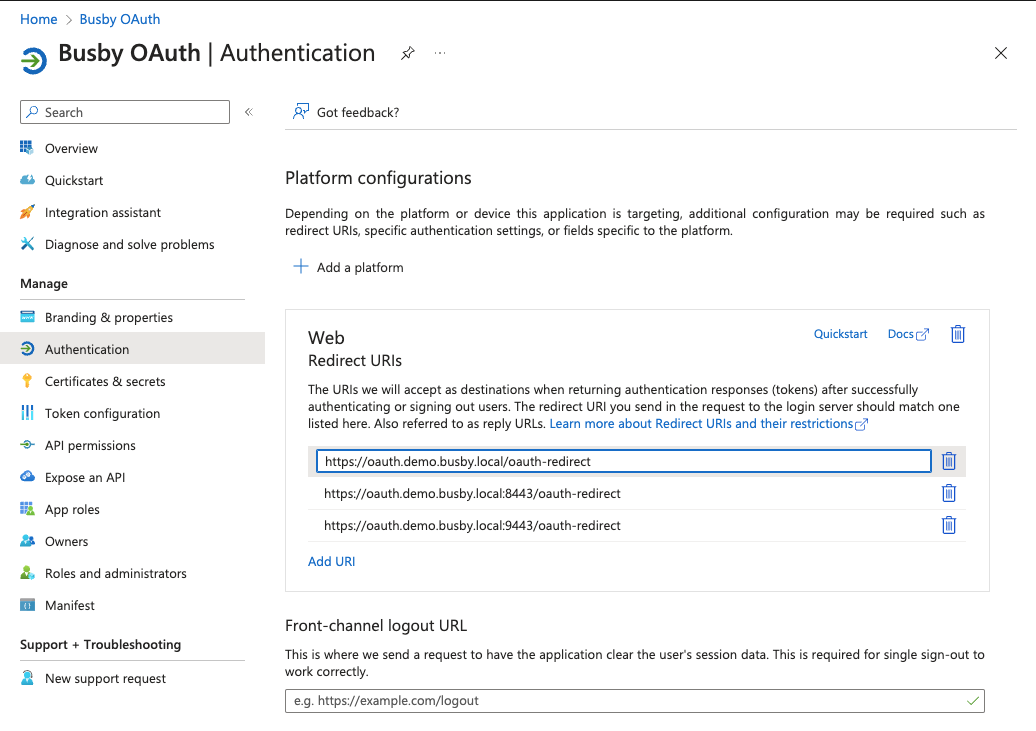
¶ 5. Set the redirect URIs
Next add the other redirect URIs for the other applications (Config Editor and Busby Admin)
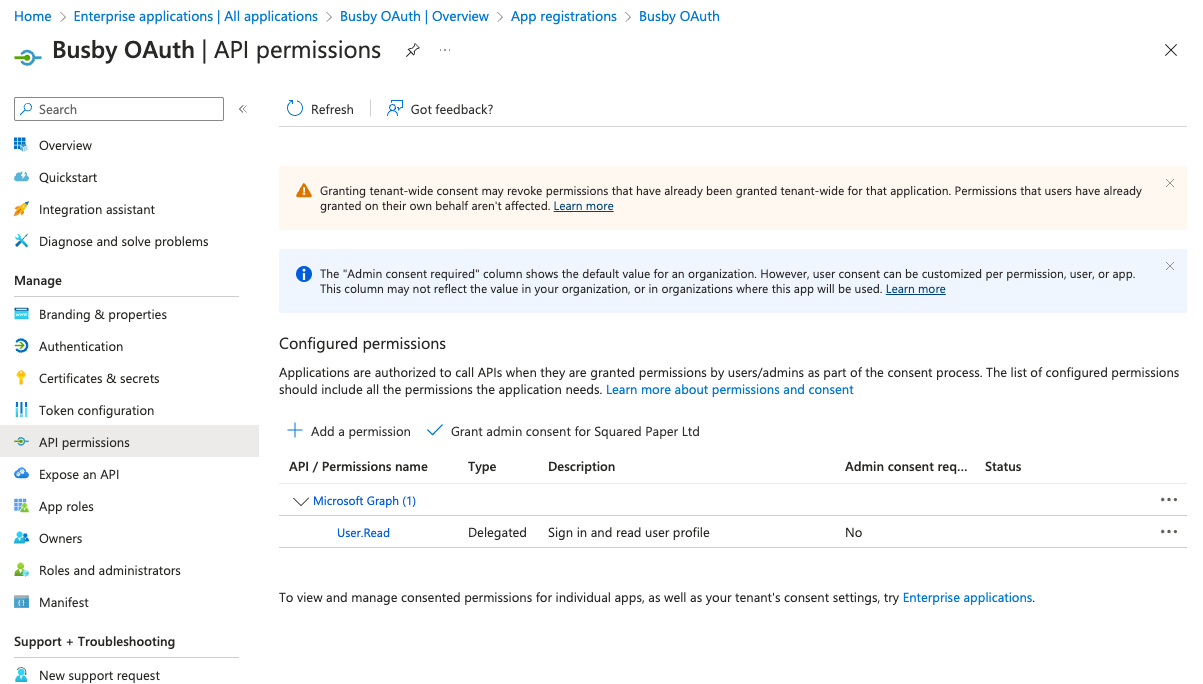
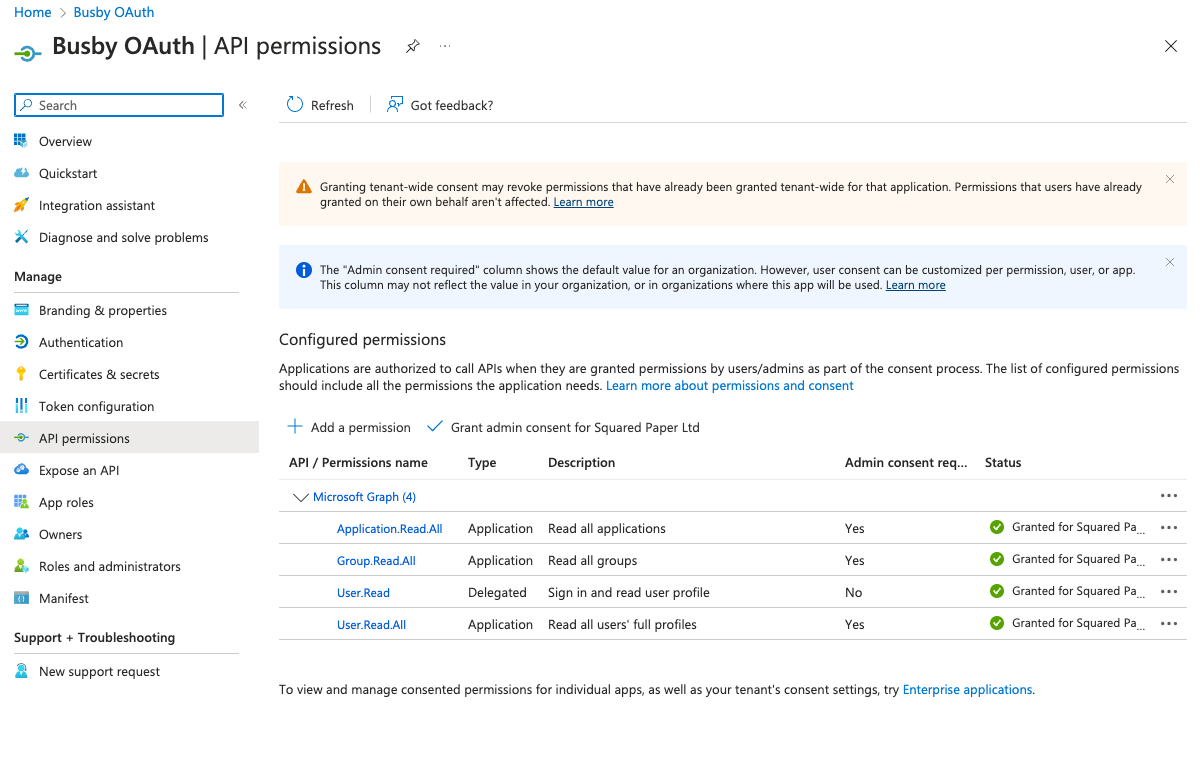
¶ 6. Assign API Permissions
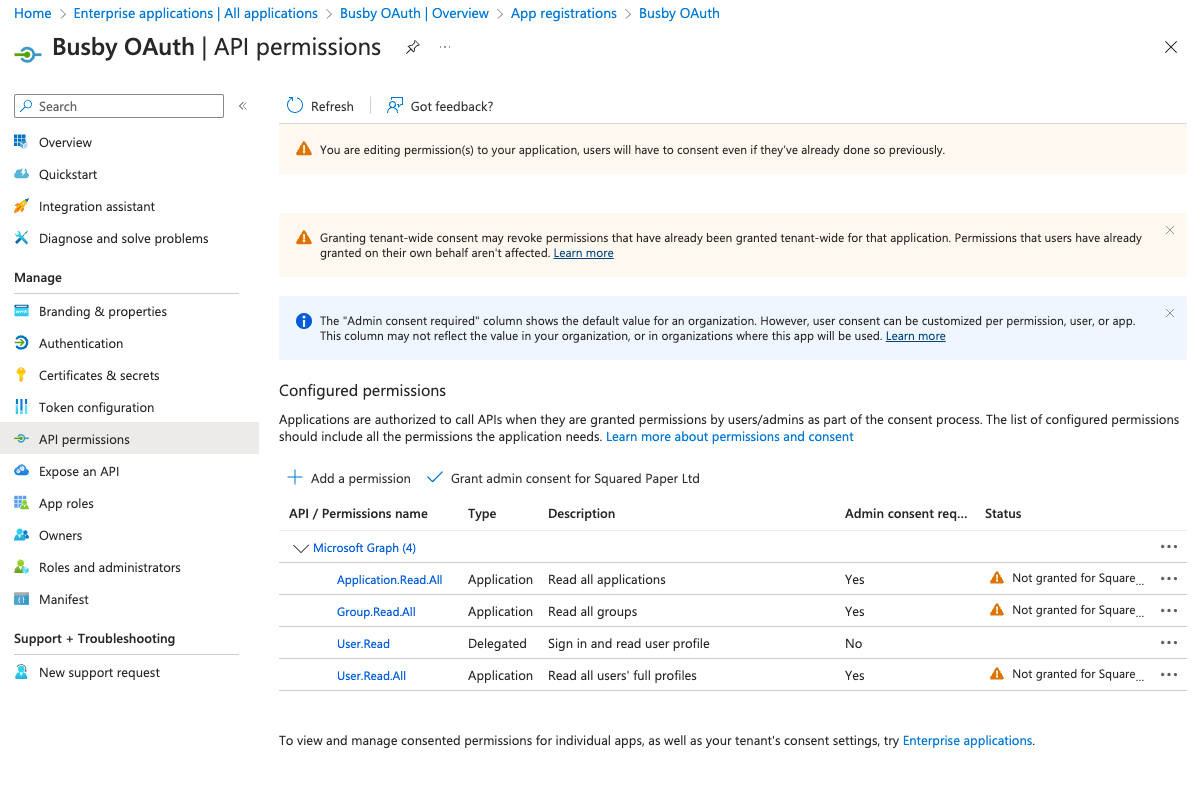
To enable synchronization the application needs some permissions added
- Application - Application.Read.All
- Application - Group.Read.All
- Application - User.Read.All
- Delegated - User.Read (Probably already added)
Note that although these are the permissions required for the application to work the only groups that are accessed are Users and Groups which are a member of the specific Busby group (Busby Users) in this case.
¶ 6.1. Add a permission
Under the API permissions blade choose Add a permission
¶ 6.2. Choose Microsoft Graph
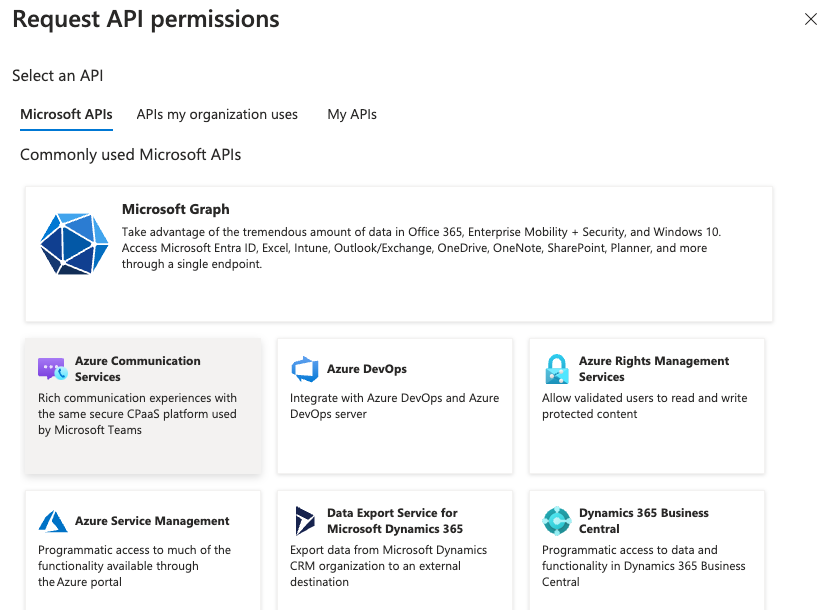
¶ 6.3. Search for the required permissions
Select Application and then search and tick the following permissions
- Application - Application.Read.All
- Application - Group.Read.All
- Application - User.Read.All
¶ 6.4. Grant Consent
Because these are application permissions Admin Conesent must be granted. From the API Permissions blade select Grand admin consent for Your Tenant Name.
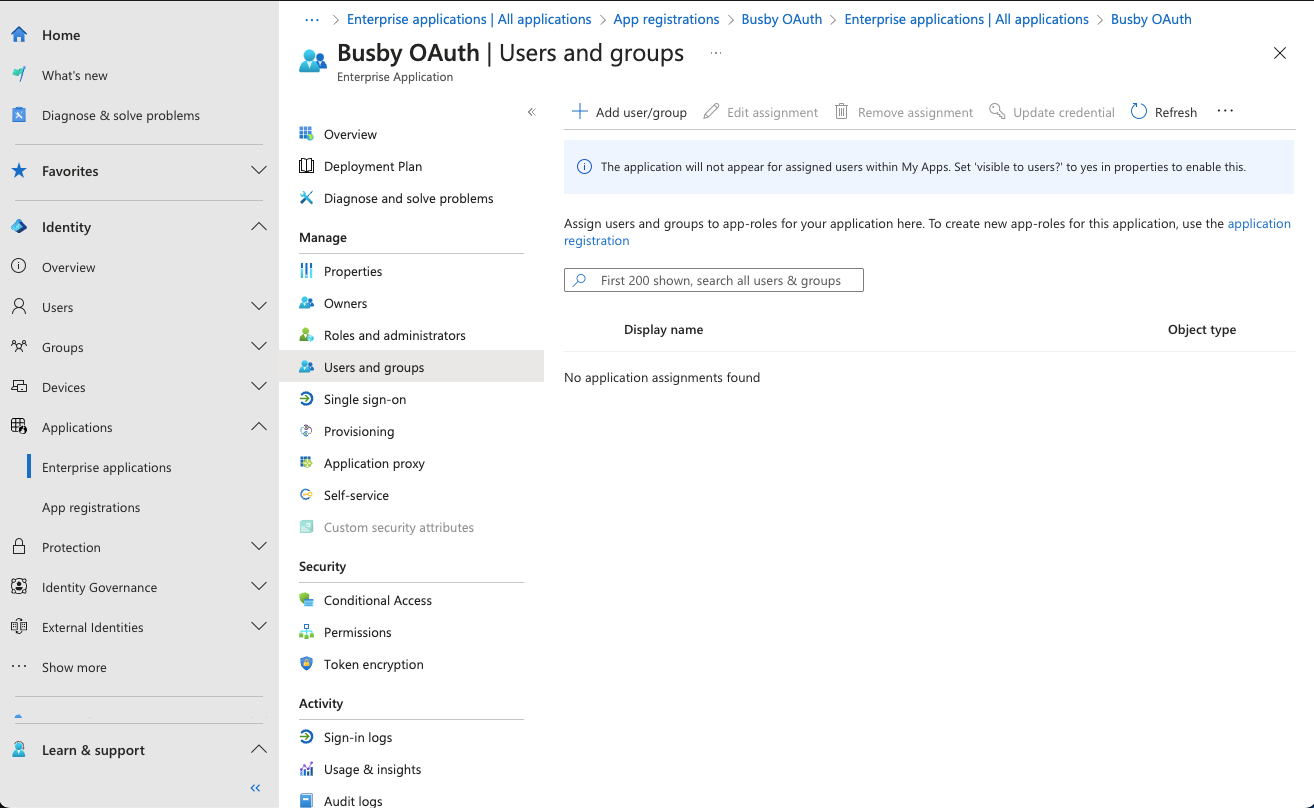
¶ 7. Assign Users and groups
To assign users and groups to the application you will need to go to the
¶ Busby Setup
Once the applications have been created in Entra ID it then needs to be added to the configuration.
From the created application you will need:
- Your Tenant ID (Also known as Directory ID) https://sts.windows.net/tenant-id-here will be your issuer
- Client ID
- Client Secret