Busby includes a simple, comprehensive system for managing users, groups and permissions.
For each application that is added to Busby Selector, one or more possible permissions are automatically added to the Busby Authentication Service.
These permissions can then be assigned to user groups, and users can be added to one or more groups.
The Busby Permissions UI is used to configure users and groups.
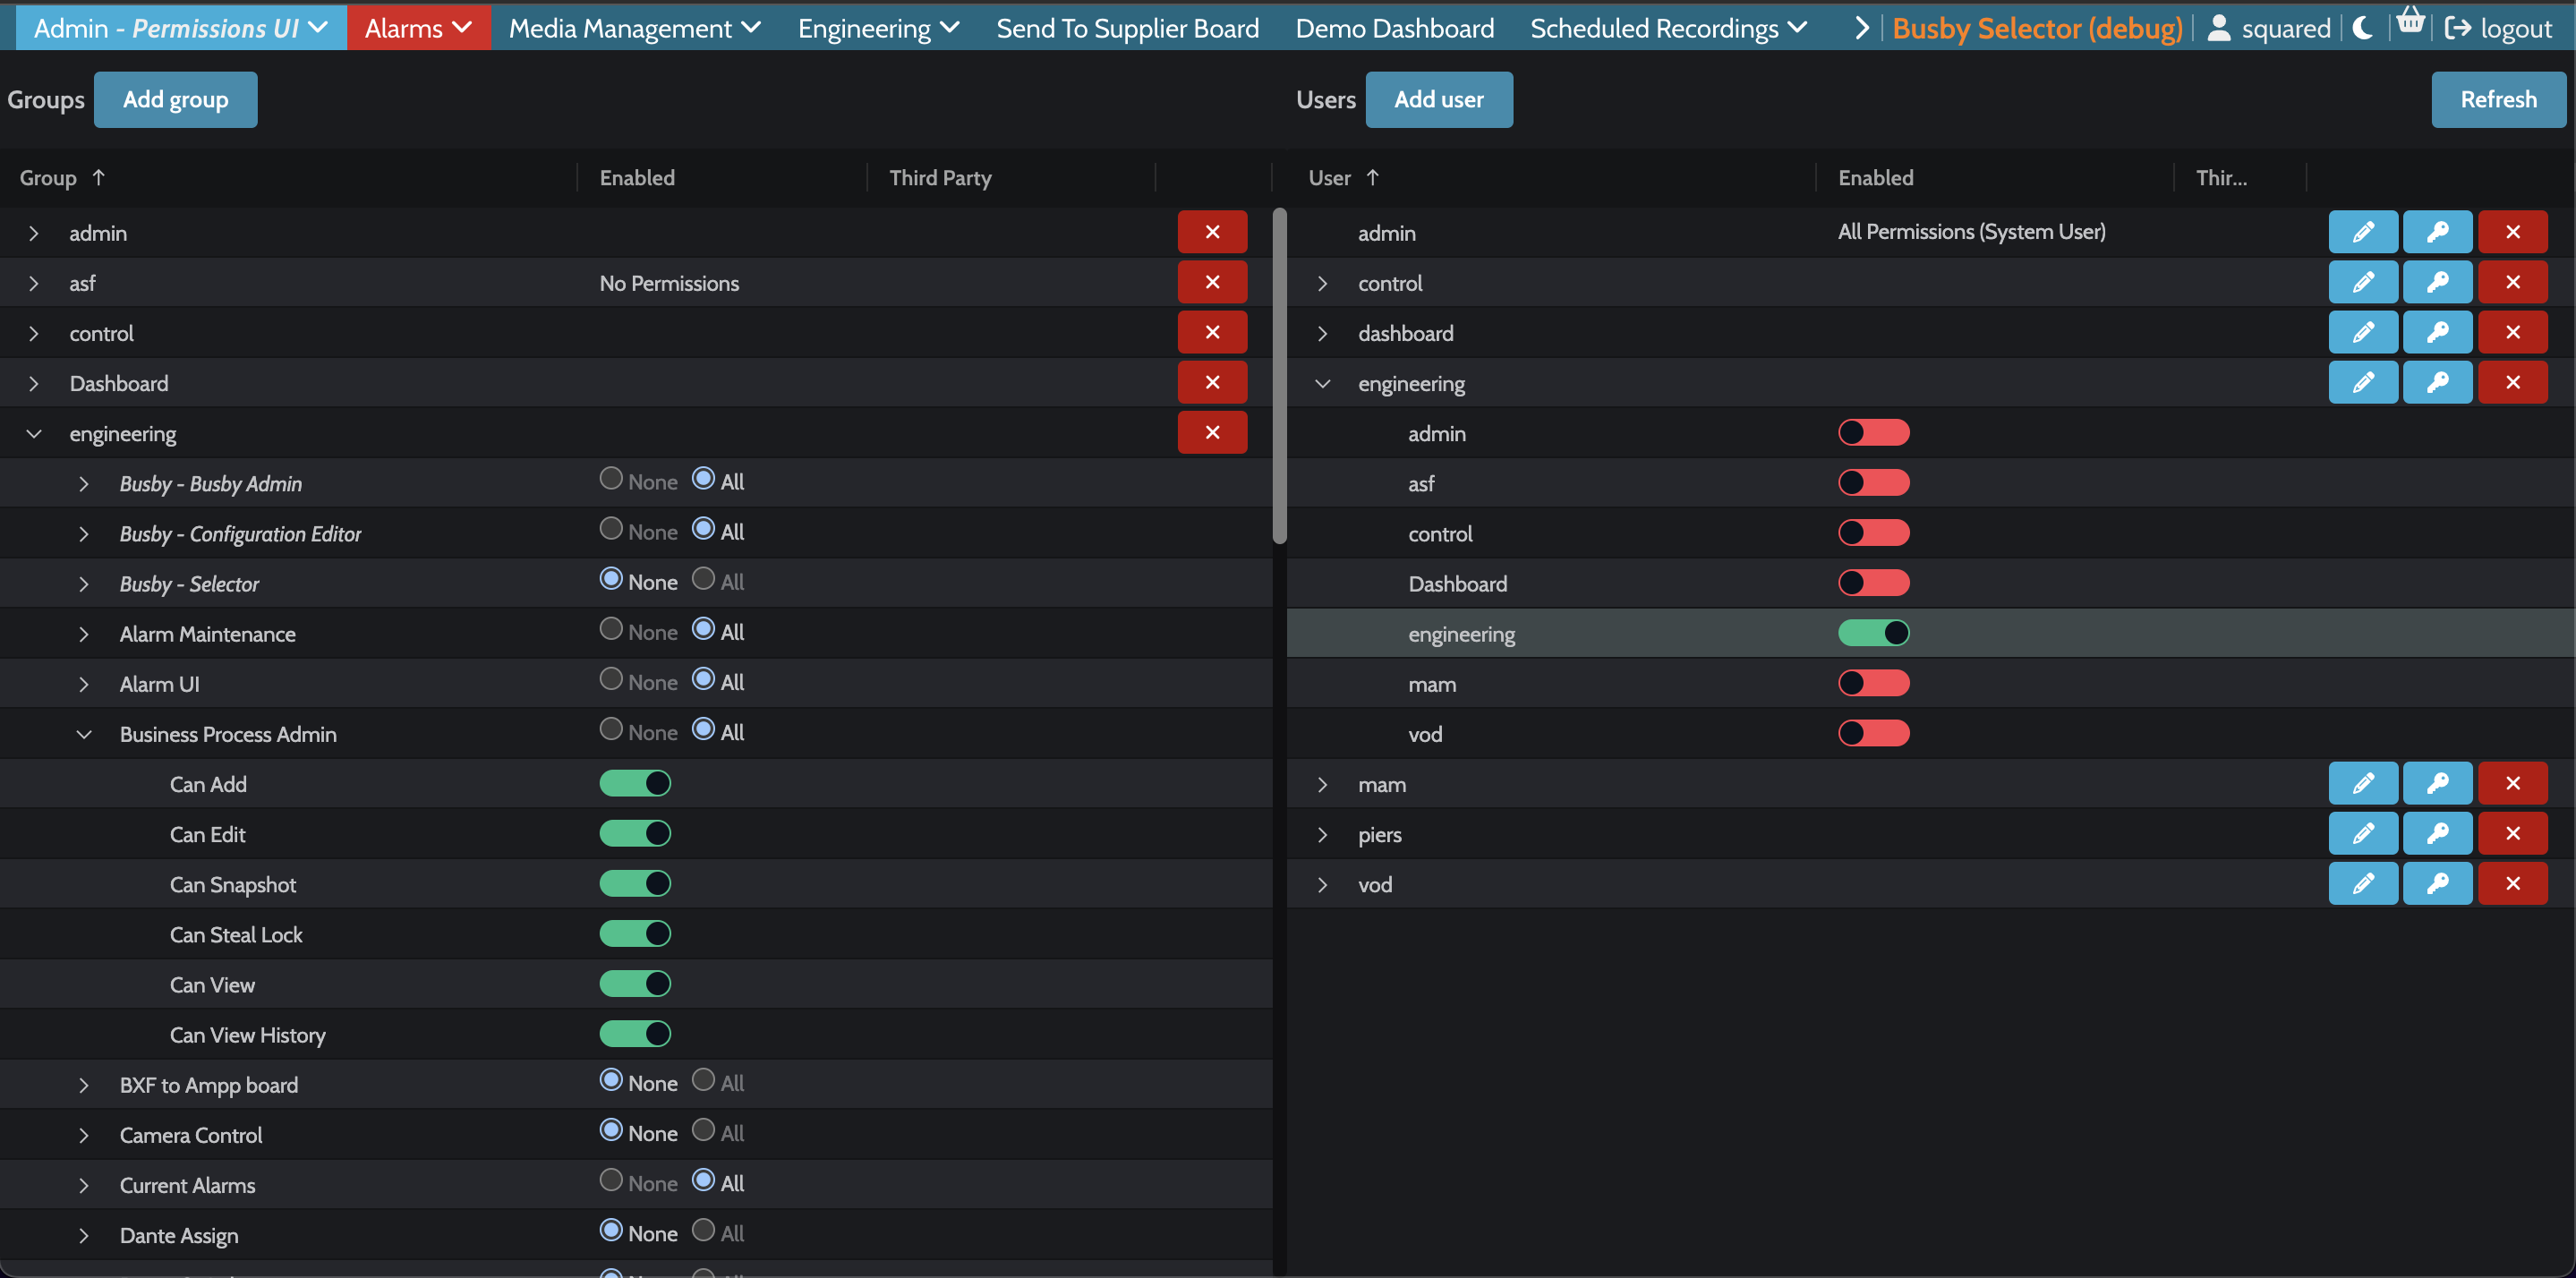
The Permissions UI shows the list of groups on the left hand side of the screen, and users on the right hand side.
¶ User Administration
¶ Adding a user
To add a user, click on "Add user" in the top right, and fill in the following information:
- Username - the desired username for this user
- Password - the desired password for this user
- First Name (optional) - this is not currently used
- Last Name (optional) - this is not currently used
- Email (optional) - this is not currently used
- Phone number (optional) - this is not currently used
¶ Editing a user
To edit the details of a user, click on the blue pencil icon on the right hand side, in the same row as the username. This will allow you to edit the fields First Name, Last Name, Email and Phone Number. You cannot change the username. To change the username, the user must be deleted and re-added with the new username.
¶ Assinging a user to groups
To assign a user to a group simply expand the user sub menu by clicking the down arrow to the left of the user.
For each available group, set enabled to Yes if the user should be a member of that group, and No if not (default).
¶ Changing a user's password
A user can change their own password inside Busby Selector by clicking on their username in the top right:
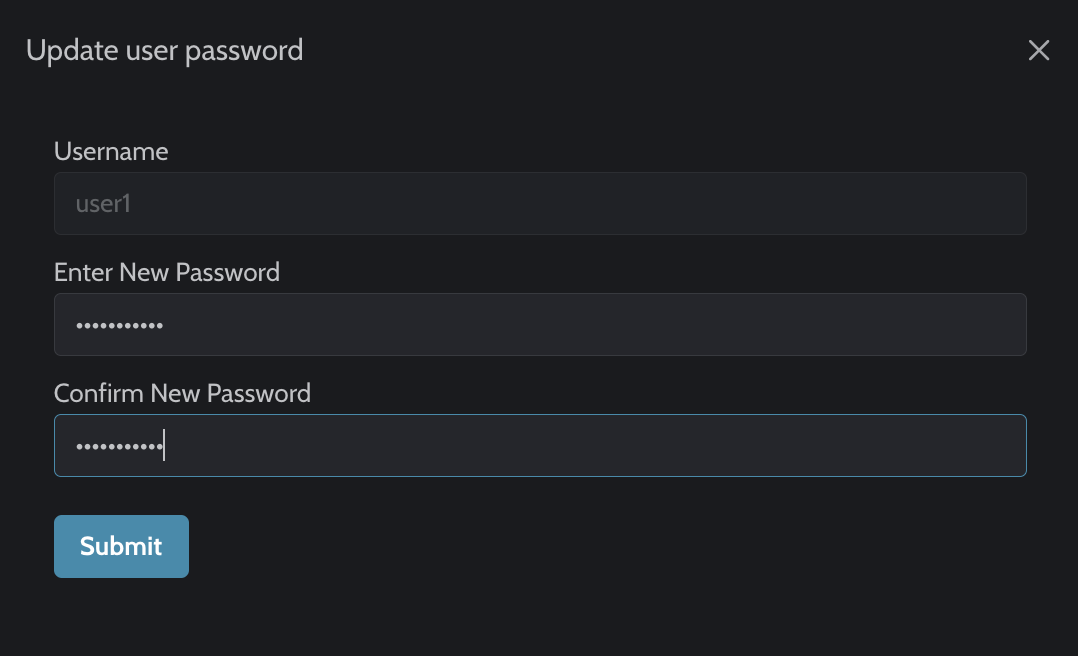
If the user has forgotten their password, an administator (or any user with access to the Busby Permissions UI, can change it for them. On the right hand side, click on the key icon on the same row as the username, and enter and confirm the new password.
¶ Deleting a user
To delete a user, simply click on the red X icon in the same row as the username, and confirm that you want to delete the user.
¶ Group Administration
¶ Adding a group
To add a group, click on "Add group" in the top left, and enter a name for the new group.
¶ Deleting a group
To delete a user, simply click on the red X icon in the same row as the group name, and confirm that you want to delete the group.
¶ Assigning permissions to groups
To assign permissions to group, expand the group on the left hand side that you want to edit by clicking on the down arrow to the left of the group name. For each application you want to enable access for that group, expand the application by clicking on the down arrow to the left of the application name. For each available permission, set enabled to Yes if you want that group to have that permission.
¶ Additive permissions
If a user is assigned to multiple groups, a additive approach is taken to assigning permissions. This means that any if the user is in any group
that has the permission enabled to access a UI or app, then the user will have access granted.
For example, a user named jbloggs is assigned to 2 groups, “users” and “supervisors”. The group named “users” does not have permissions to access the Busby admin UI.
The group named “supervisors” does have permissions to access the Busby admin UI. Therefore, the user named jbloggs does have permission to access the
Busby admin UI.